

Spellbinders—Open House Fall Card
Hi Crafters! Welcome back to the blog!
Today I’m sharing a fun fall card using the Open House die set as well as a few add-ons from Spellbinders. I picked these sets up late last fall, so I never got around to using them. I’m so glad I busted them out, I think this card is really cute! I hope to dig into my stash to create more fall cards (with the exception of one more new fall product from Concord & 9th), so be on the lookout for that!
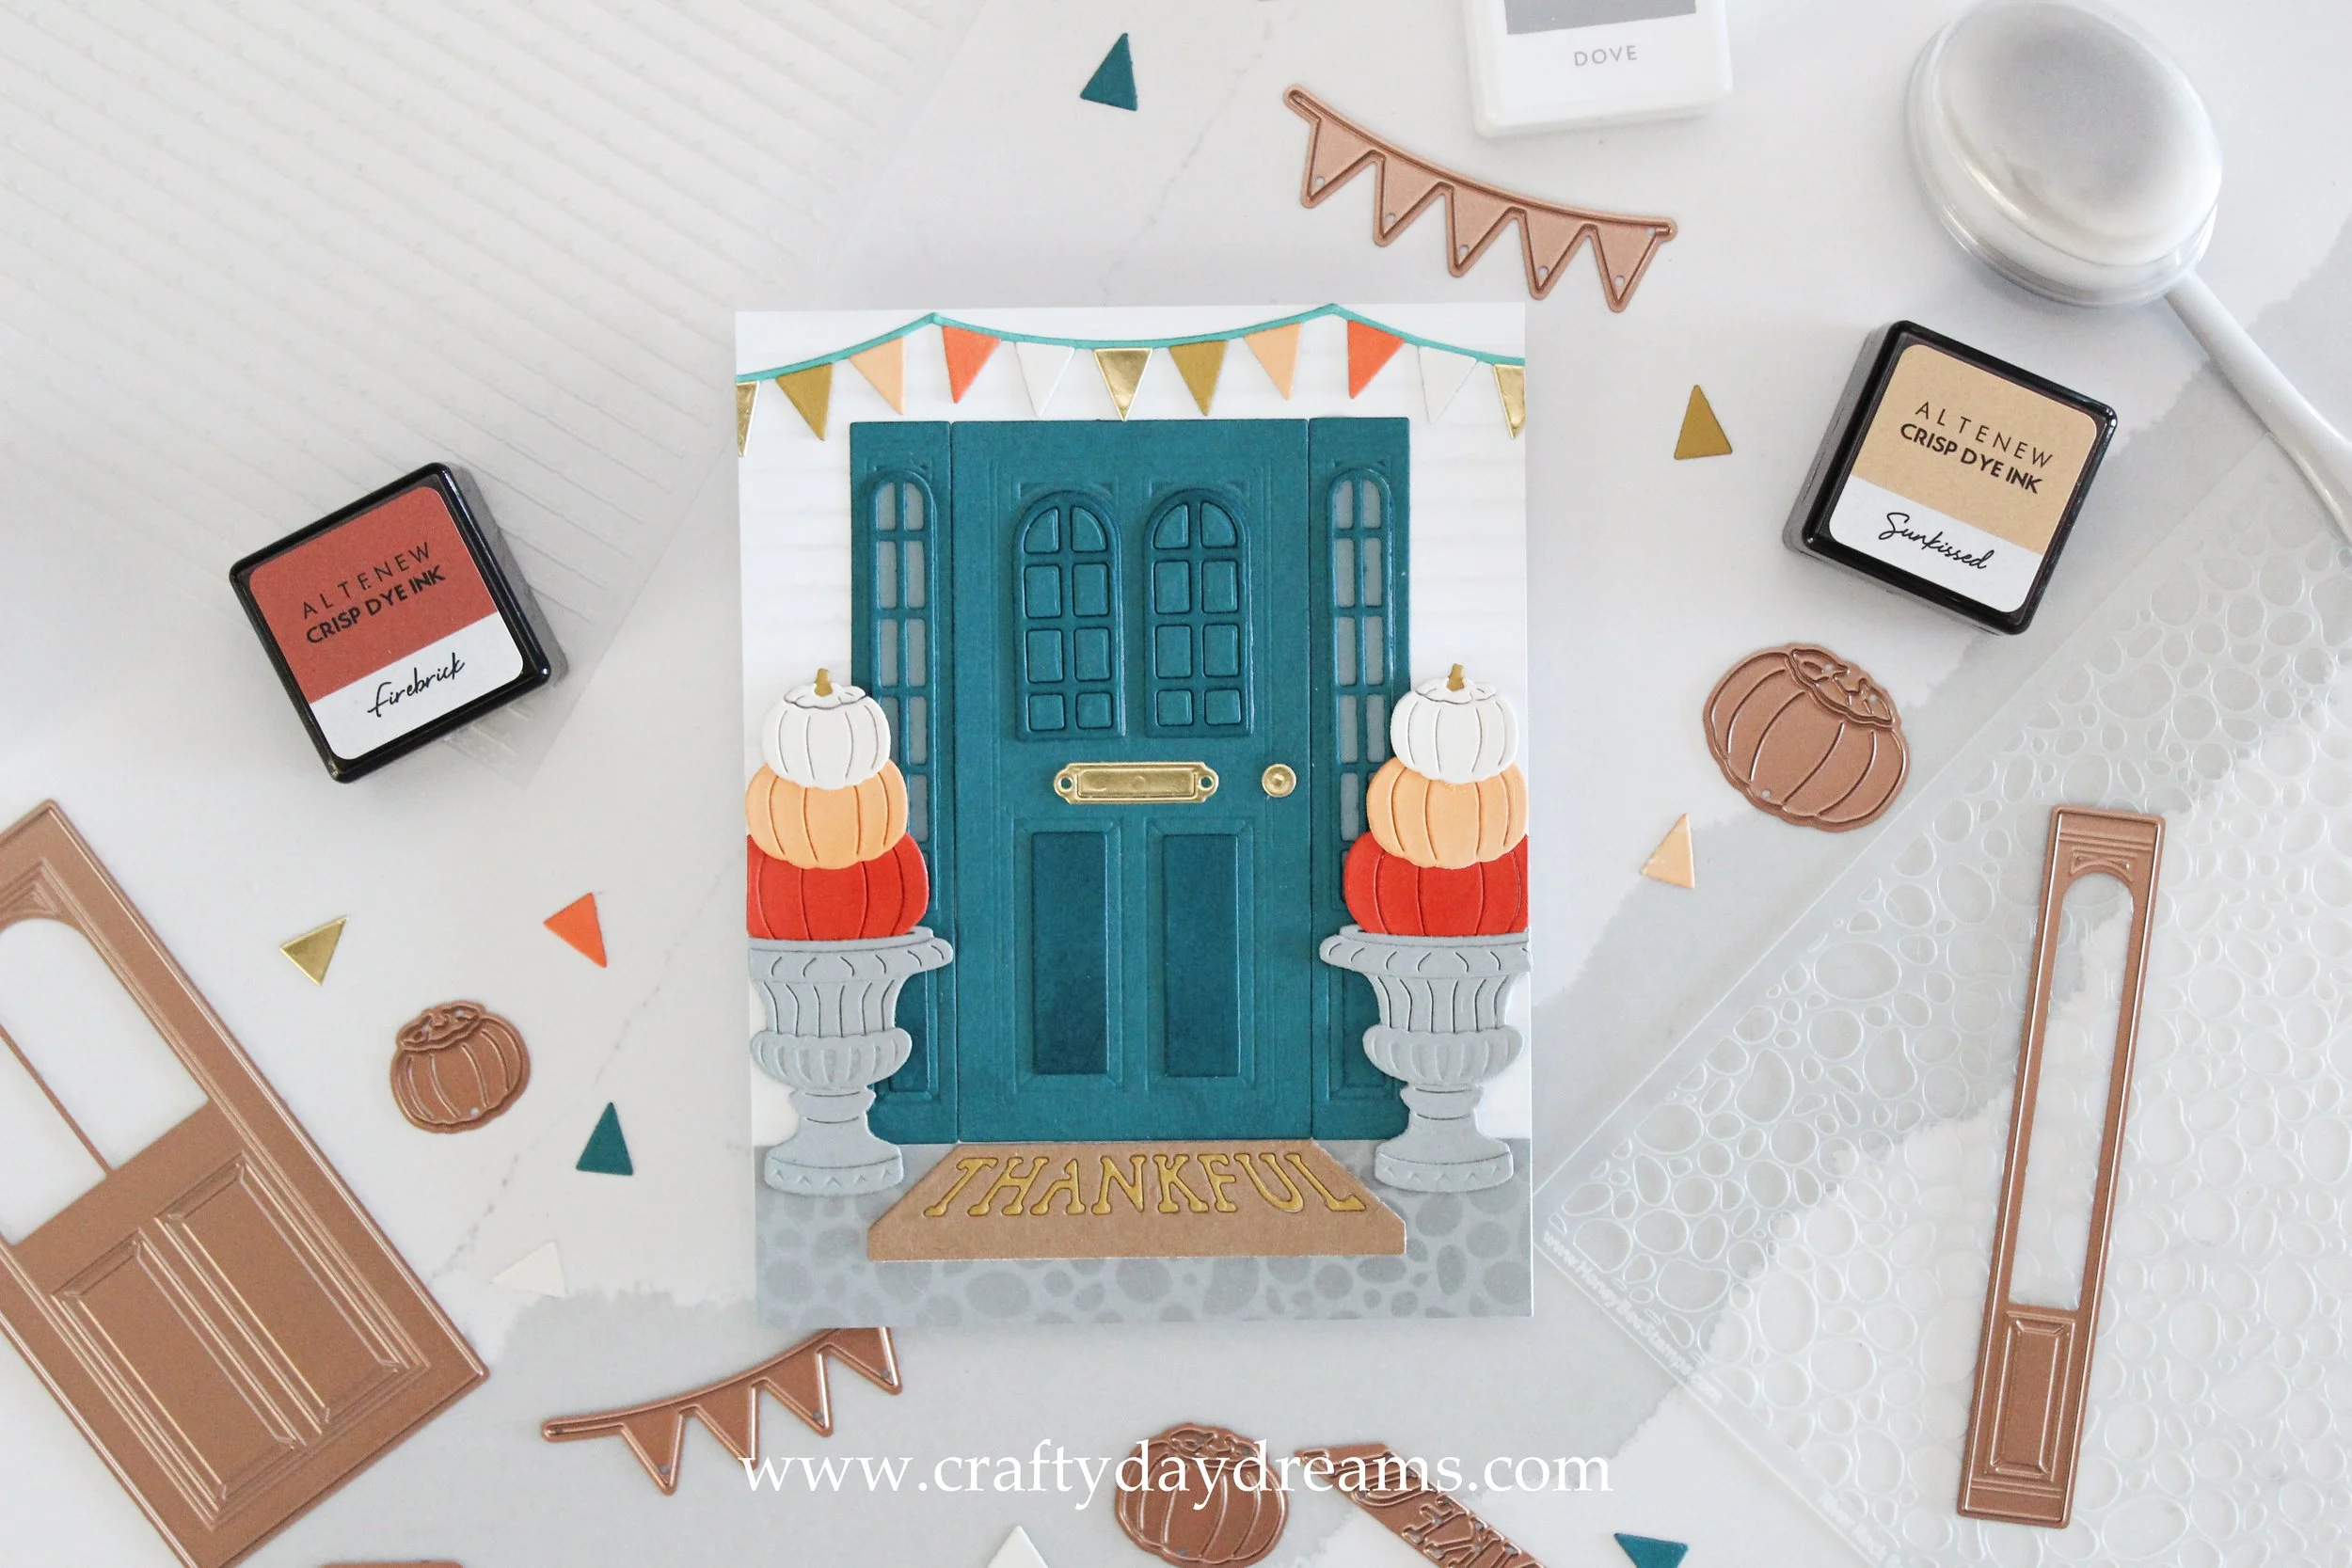
I started this card off by working on the door since I knew right off that bat that I wanted it to be cut out of Peacock cardstock from Concord & 9th. I die cut the rectangular detail panels and the window arches out of the same cardstock and darkened it up by ink blending Peacock ink over it. I die cut the windows out of vellum and used the smallest drops of glue on the back of the window frame so the glue wouldn’t be visible. I was off to a perfect start with this until I glued the left window on the door. I was a little ambitious with my glue, and I ended up with visible glue marks that spread into the window section, and they were very noticeable. Since I couldn’t remove it, I decided to pivot and glue the fall out pieces in to save the card. To finish the door off, I die cut the mail slot and the doorknob out of C9 gold cardstock.
Once I had the door completed, I started to work on the background. In a lot of the examples I’ve seen from Spellbinders, they tend to use embossing folders as backgrounds. I, on the other hand, only have maybe 3 of those and none of which fit the theme of the card, so I decided stenciling was the way to go. I ended up using the Square Shingles stencil from Honey Bee Stamps to make it look like this door was on a house. This stencil is really nice, but not necessarily the easiest to blend onto, so if you have it/pick it up, you might want to get some pixie spray to hold it down securely. I ink blended Dove ink from Concord & 9th on to make this house look like it had white siding since I couldn’t decide what color I wanted it to be haha.
To ground the scene, I decided to use another stencil for a porch. I ended up using the River Rock stencil, also from Honey Bee Stamps, and ink blending Dove ink over Dove cardstock. I love how this looks in the scene, I think it really pulls it together. For the ‘thankful’ doormat, I used the Open House Thankful add-on, and die cut the doormat out of Wheat cardstock using both the doormat and the ‘thankful’ die. I die cut a white doormat as a backer to the Wheat one so that I could inlay some Stardust colored letters.

Next I moved onto decor. I used the Open House Pumpkin Topiary die set and cut the topiaries out of Dove cardstock. I knew I wanted to have Ivory colored pumpkins, so I cut Simon Says Stamp Ivory cardstock using the smallest pumpkin die. I wanted different oranges than I had cardstock for, so I decided to do some ink smushing to get the perfect shades. I used Firebrick, Orange Cream, and Sunkissed inks from Altenew and smushed some on white cardstock. After it dried, I die cut the medium and large pumpkins out of the Firebrick and Sunkissed sections. To finish off the ivory pumpkins, I die cut the pumpkin tops out of Stardust cardstock.
To give this card a more fall look, I went back to the Open House Thankful die set. I die cut the banners out of Oceanside cardstock from C9, and die cut the triangle bits out of the leftover orange cardstocks I made, as well as Stardust and gold cardstock. After a bit of fussing, I glued the banners down in a swoopy manner above the door.
So, what do you think?! Deep blues and rusty oranges are reds are my favorite this time of year, and I feel like this card has the perfect fall vibe and I love it 😍. I hope this card inspires you to break out this die set if you have it! I’ll catch you next time with more inspiration 😊.