

Concord & 9th—Christmas Ornament Shaker Card
Happy Friday, Crafters! 🎉 We made it through another week, and I hope it was a good one for you!
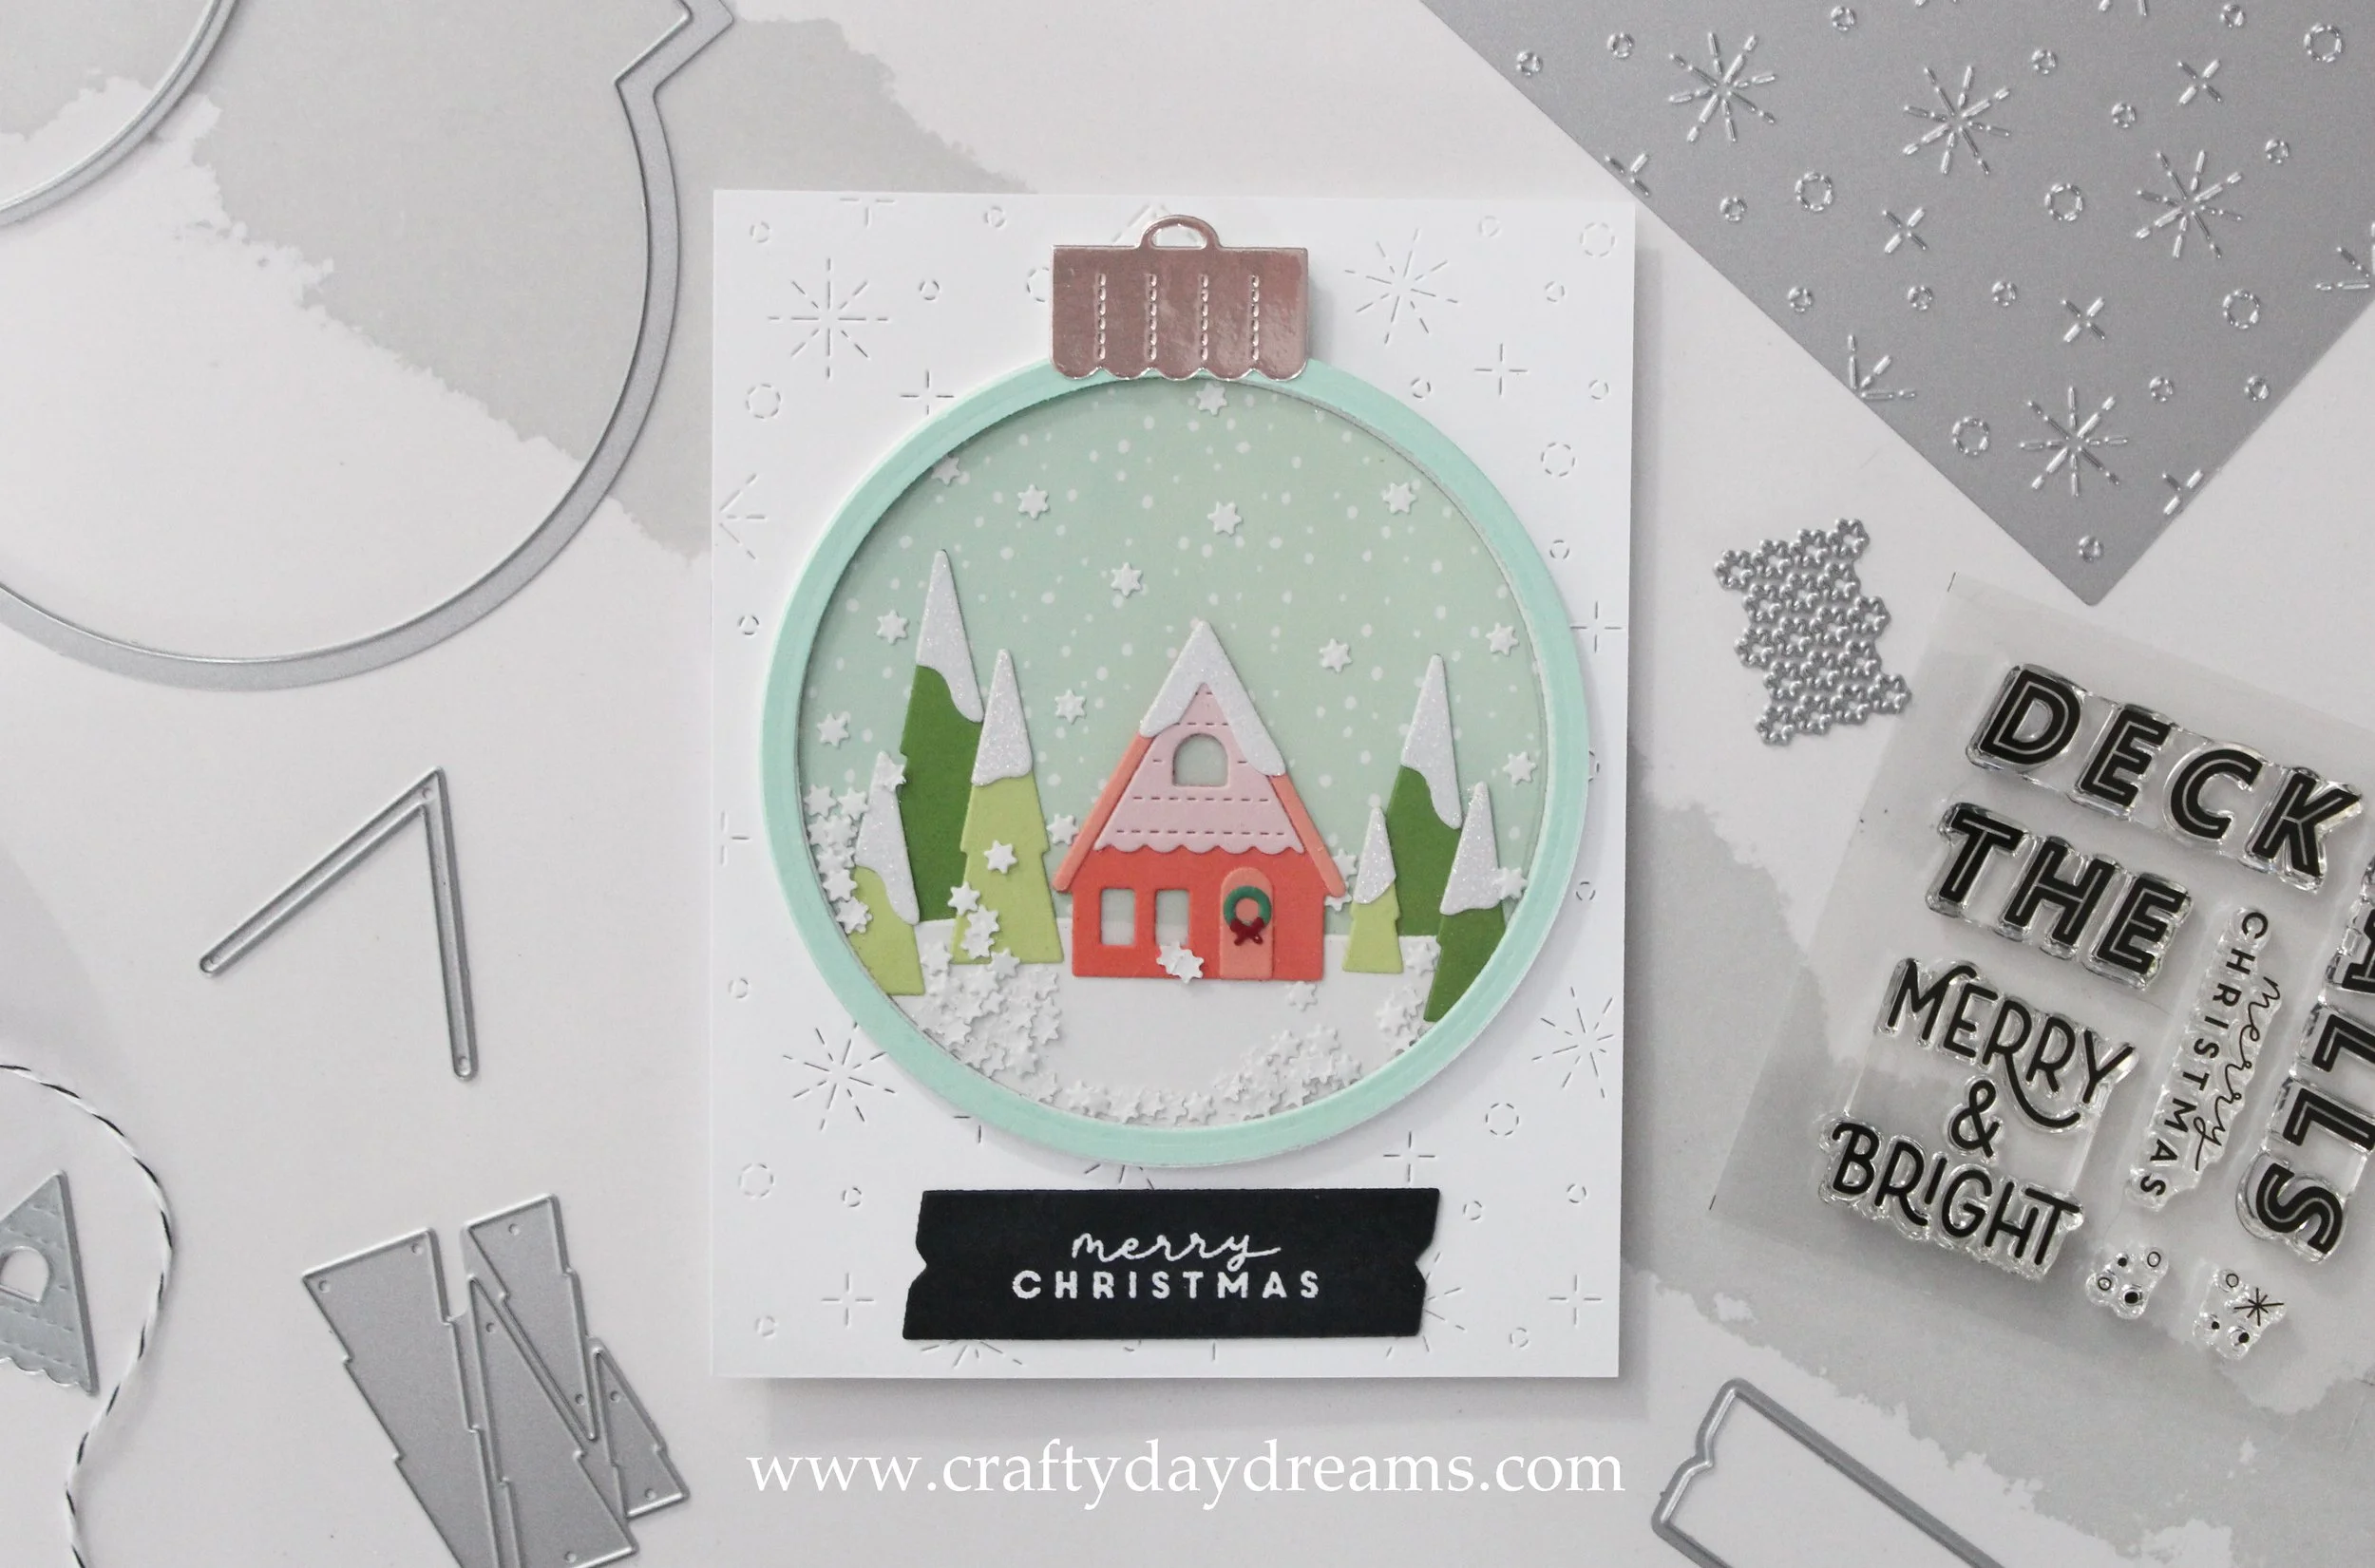
Today I’m sharing an adorable Christmas ornament shaker card I made with some new and some old Concord & 9th products. I love this card so much, there’s such a sweet softness to it that just makes my heart soar. This card originally started off with me thinking I was going to use the Ornamental die set and slap it over some greenery, but I couldn’t figure out the right color combination for the ornament. While stewing on color combos, I got the idea to turn the ornament into a shaker card and make a scene with the Home for the Holidays die set, and I couldn’t love this idea more! Luckily, I have some completed houses sitting on my desk (another unfinished project dating back to July 😅) so this card came together fairly quickly. The most tedious part was die cutting and lining up the shaker window nine times to build up the shaker well.
Once I had my idea, I started slapping things together. I die cut the outer ornament layer out of Sea Glass cardstock and the ornament topper piece out of Rose Gold cardstock. The shaker scene was made by using the same circle die (part of a SSS nested circles die set) that cut the shaker window on a piece of Sea Glass speckled cardstock from the Garden Party patterned paper pack. This makes the perfect snowy sky. I took the hillside die from the Home for the Holidays die set and die cut one of the many fallout circles I had from making the shaker frame which allowed me to get the perfect curve to the snowbank. I used Sprout and Parsley trees that I topped with C9 white glitter paper, which I also added on top of the house. The house was made out of a Sorbet base, Grapefruit roof and door, and Ballet Slipper cedar shake siding piece. The windows do have two layers of vellum behind them to make the windows look a little frosted, and the wreath on the door was die cut out of Clover and Cranberry cardstocks. I tucked two of the trees behind the snowbank to add depth to the scene and glued the rest in a staggered arrangement on top off the snowbank.

One thing I’ve learned from Jennifer McGuire is that when she makes shaker cards, she will often glue some of her shaker bits onto the scene so that when the card is standing up, some of that shine/detail is always there. I decided to do that with this card using the small snowflake die from the Winter Wonderland die set. I used the die six times on plain white cardstock, glued some of the snowflakes on in an organic pattern, and used the rest as shaker fill. An oops moment I had while making this card was playing around with fine glitter. I was planning to make the shaker fill a combo of the snowflakes and fine white glitter, but it just turned out very messy and took away some of the detail, so I decided just to use the snowflakes.
When the shaker piece came together, I was really tempted to not turn it into a card, but to actually save it and hang it on my Christmas tree haha. It’s so cute, and the ornament topper piece would make it easy to thread some string through it and make it happen. This would also be so sweet to send to someone, but instead of gluing it to the card base, using removable adhesive so the recipient could hang it on their tree. I know I would love that!
Now back to shaker card assembly real quick. The easier way to put this card together, but one that would not yield an ornament like I have here, would be to cut your shaker window out of your card front and build your shaker well out of foam tape on the back of the card front. That would take away the tedious job of die cutting many ornaments, lining up the window die just right, and gluing them all together. Both versions of shaker card assembly work, but you can choose which method you feel like tackling if you make this card!

Now back to the final details on this card. I used the new Snowfall card front die on a white card front and glued the ornament on top of it. I did try to tie a bow (it looked cute), but I couldn’t get it to lay the way I wanted to, so I nixed it. For the sentiment, I used a delicate ‘merry christmas’ greeting from the Boughs & Holly stamp set since I felt the style really fit this scene. I white heat embossed it on C9 black cardstock and die cut it using one of the Boughs & Holly sentiment banner dies. I realized at the time of writing this that I could have used the sentiment banner from the Home for the Holidays die set to cut the sentiment out too, let alone, I could have used the sentiments from the corresponding stamp set. The sentiment possibilities are endless!
So that wraps up this card! Hopefully my word vomit was easily to follow along with on this, if not, feel free to ask me questions down below, or shoot me an email (amanda@craftydaydreams.com)! Thanks for stopping by and reading the blog! I hope to catch you next time with more inspiration.