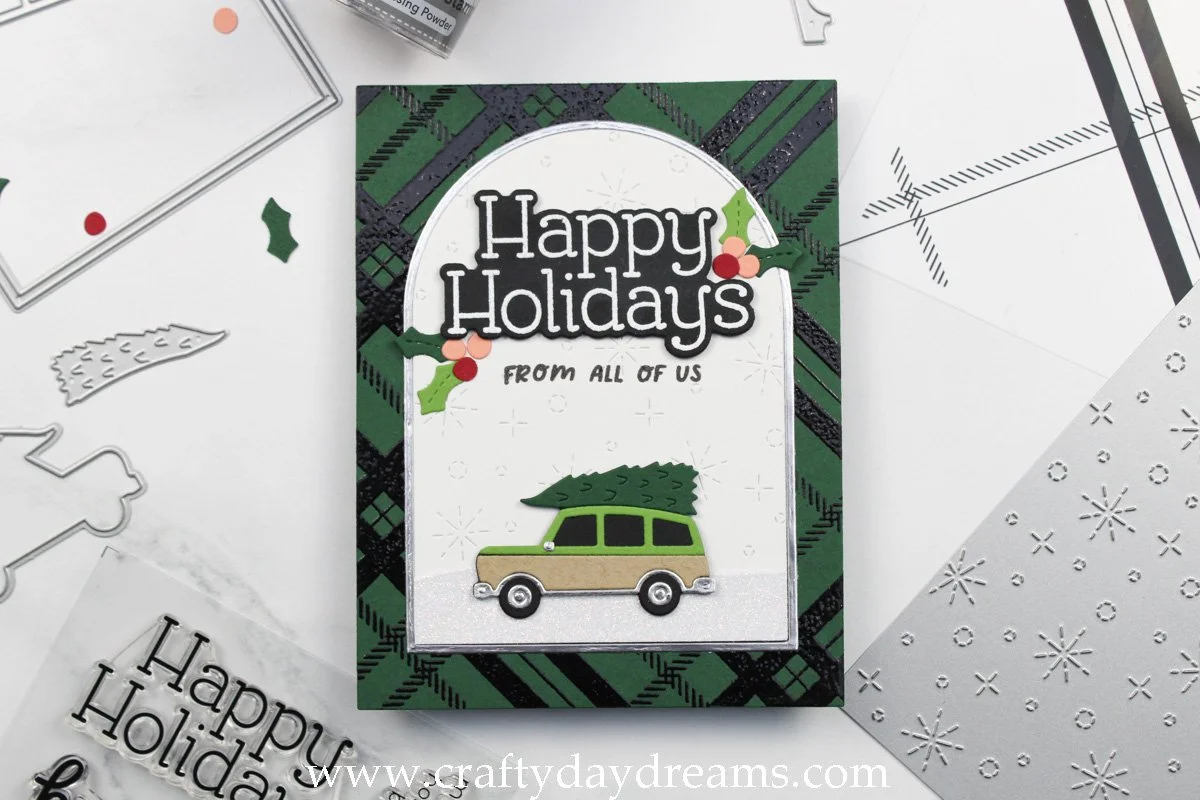
Concord & 9th—Christmas Vacation Inspired Cozy Christmas Card
Hi, friends! Welcome back to the blog!
This post should be the kickoff of the return to more normal content sharing. I’m hoping to get back to posting three times a week, but I also want to give myself some grace. I’m so excited to share this card today since it’s a bit of a play on my favorite Christmas movie, National Lampoon’s Christmas Vacation.
I used a handful of products from Concord & 9th’s September holiday release: the Snowfall Card Front die, the Winter Wonderland dies, the Plaid Turnabout stamp, the Festive Phrases stamp set (and coordinating die) and the holly and berry dies from the Boughs & Holly die set.
I started this card off by die cutting the car. Since the inspiration for this was the Truckster from Christmas Vacation, I die cut the parts of the car out of black, Parsley, Wheat, and matte silver cardstocks, as well as Evergreen for the tree. I had originally planned to make this card on a mini slimline, but changed my mind last minute to make it an A2. I really wanted a festive background to it, so I busted out the Plaid Turnabout. I decided to stamp 3 turns and heat emboss it in black on Evergreen cardstock, and I loooove how it turned out. It’s such a cozy plaid.
Last month I purchased the Essential Arches dies from Ellen Hudson, and I decided to use them on this card. I’ve been waiting to buy nesting arch dies for quite some time, and I’m really happy with these! You get your arch, but each arch die also cuts out an arch frame, which is pretty useful. I decided I wanted a snowy backdrop for this scene, so I used the Snowfall card front die on plain white cardstock, then die cut that panel with the arch die. To build the rest of this little scene, I used the snowbank/hill die from the Home for the Holidays Stacks die set to cut a snowbank out of C9 white glitter cardstock. Once I had the snowbank on the arch panel, I die cut two arches out of plain white cardstock to add dimension to the panel once it was glued on the card front. At this point, I decided it would look really nice if I had a silver frame around the arch, so I die cut one out of the same C9 matte silver cardstock.
I popped the car up on some foam squares, and stuck it on the snowy road. From here, I worked on the sentiment. I ended up white heat embossing ‘Happy Holidays’ on black cardstock and used the coordinating die to cut it out. Before sticking it on the card, I realized that the card needed a pop of color, so I die cut some holly leaves and berries from the Boughs & Holly die set out of Parsley, Evergreen, Grapefruit, and Cranberry cardstocks. Once I had these glued down how I liked, I popped the sentiment up on foam squares and stuck it down.
Now at this point things went a little downhill haha. I had originally planned to mimic snowfall using the small snowflake die in the Winter Wonderland die set, but all of a sudden, I really did not like what I had going on. I knew I had too much space between the greeting and the car (and my crafty friend Jan confirmed just that to me too), so I got to work on fixing that. After digging through my stash and feeling defeated, I pulled out the stamp set from the most recent In the Classroom holiday event from Concord & 9th. The sentiment I chose to use says ‘from all of us’ and I thought it seemed very fitting with the greeting, and the size of it seemed perfect.
Before stamping this sentiment, I did ‘try it out’ by stamping it on some extra packaging I had so I could see what it looked like before committing. I liked how it looked, so I stamped it in Simon Says Stamp Intense Black ink. Having a MISTI is super useful when stamping over a card front die since the stitching/design they have might force you to stamp twice (and color in with a marker) to get a full, clear stamped impression.
Once I had the greeting stamped, I called this card done so I wouldn’t create any more issues I couldn’t fix. So what do you think?! I feel like this card feels like a cozy blanket, and I love it. I know just who I’ll be sending it to once I start to mail Christmas cards.
Thanks for stopping by the blog today, I hope to catch you next time with more inspiration! 😊


