

Concord & 9th Feature Friday: Garden Grown Bundle, Happy Thanks Bundle + Giveaway!

Happy Friday, friends!
Today I’m back with my last Feature Friday with Concord & 9th for their October 2022 release. This has been such a fun month full of great products and projects from my co-designers Seeka and Veronica! I’m so grateful to Concord & 9th for giving me the opportunity to guest design for them this month, head on over to my Instagram to get entered in giveaway they are sponsoring! (giveaway closes at midnight PST 10/30, winner will be chosen Monday 10/31)
This week’s projects focus on the Garden Grown bundle and the Happy Thanks bundle— both of which are super multipurpose! I love a good word die, and the Happy Thanks bundle has you covered on two of the most needed cards. The Garden Grown bundle can be combined with them or can even be used to make cute Valentine’s cards with the punny stamp set.
Garden Grown Bundle
This bundle is so fun! I love the stencil pack included in it, and the dies and sentiments are so fun too! The sentiments in this help to make it a multipurpose bundle—you can turn a handful of them into a punny Valentine’s card, or you can pair them with larger sentiments (like I did for the second card), use them for anniversary greetings, or use the sentiments as is.

When I was first brainstorming about this bundle, I really wanted to pair it with the Picnic Plaid Turnabout. It really makes me think of a summer afternoon picnic. So I got to work doing just that. I stamped all four turns of the Turnabout in Poppy ink, then cut it down to A2 size. I used the oval die from the Friendly Florals die set, cut it out of plain white cardstock, and glued it in the center of the panel. I die cut peppers out of Cranberry, Poppy, and Evergreen cardstocks, and all the stems out of Parsley cardstock. I die cut the carrot out of Marmalade cardstock, blended some Marmalade ink along the edge of it, then backed it with a piece of Buttercup cardstock and added a Parsley stem. The mushrooms were cut out of Mushroom cardstock, and the peas out of Sprout. The large tomato was cut out of Poppy cardstock and Clover cardstock for the stem. Like the carrot, I added some shading to the side of it (which got mostly covered up by the small tomato) with Cranberry ink. The small tomatoes were die cut out of Buttercup cardstock, and I blended on Marmalade ink (I did my best to make Sungold tomatoes—these are my favorite), and topped them off with a Clover stem. Lastly, the radish was die cut out of Honeysuckle cardstock which I blended Cranberry ink onto to add some dimension. The radish stems were cut out of Sprout cardstock and had Parsley ink blended onto the leafy tops. I staggered the arrangement of the veggies and once I was happy, I glued them down.
To finish the card off, I white heat embossed the sentiment ‘I’d pick you as my friend every time!’ in Gilded embossing powder from Brutus Monroe on plain white cardstock. I die cut this out with the sign die from the Freshly Picked die set and die cut the sign post out of Wheat cardstock.
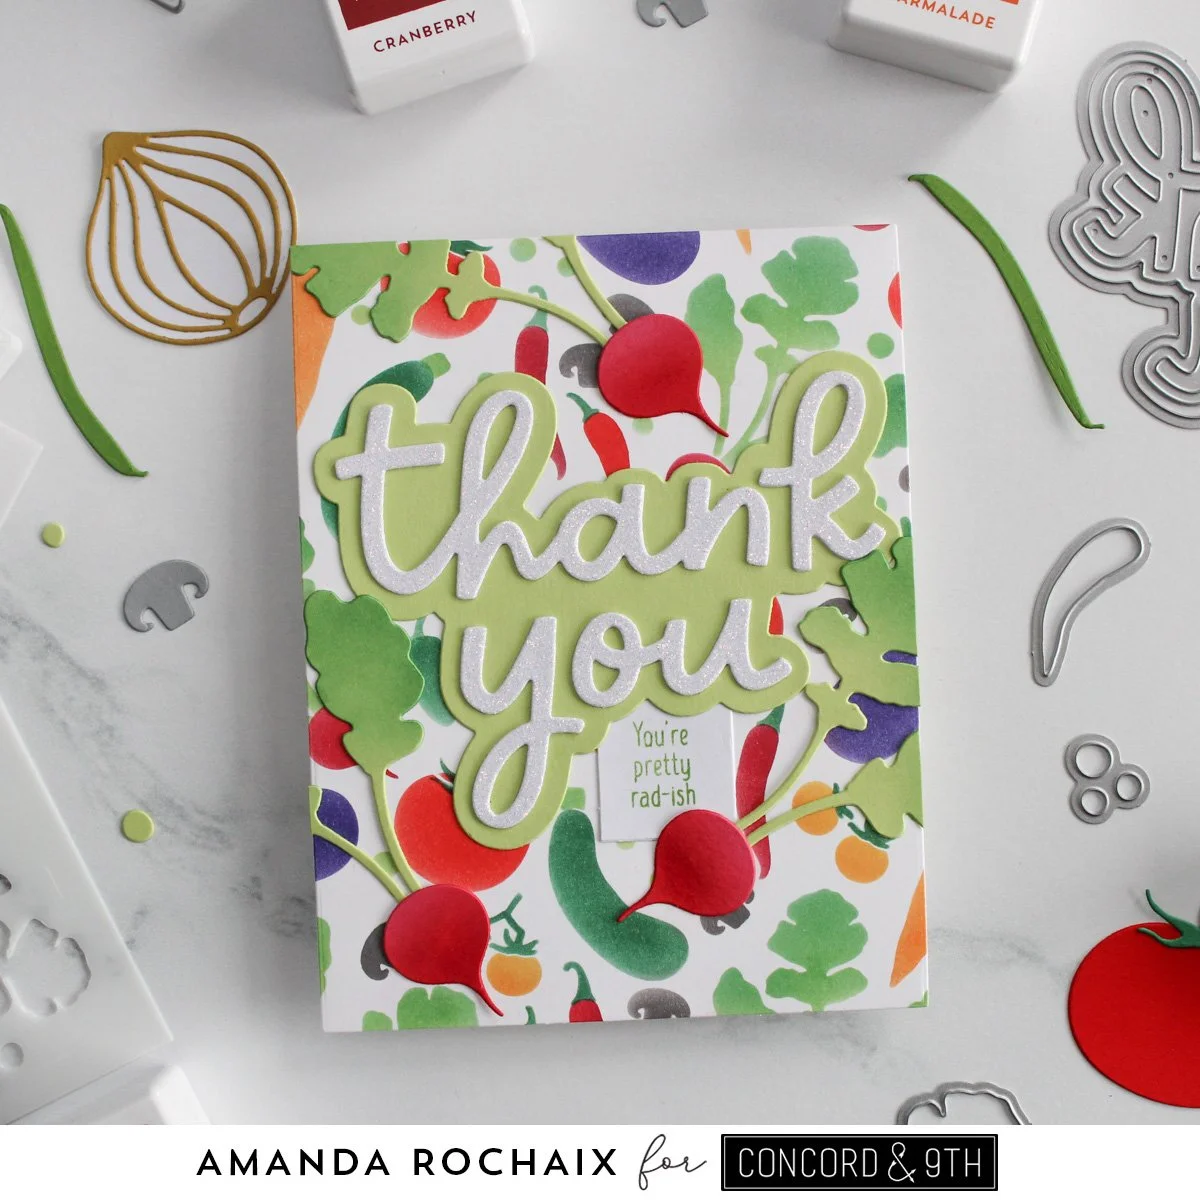
I had a lot of fun with this card. Did I mention I love the stencils in the bundle?! I’ve found that I’ve been having a lot of fun with stencils lately, especially since it’s so fun to add dimension onto things by blending multiple colors. I stenciled this panel the same way as I did in my calendar using Cranberry, Poppy, Honeysuckle, Marmalade, Buttercup, Sprout, Parsley, Evergreen, Eggplant, and Mushroom inks. Once I had the panel completed, I cut it down to A2 size.
I die cut the ‘thank you’ from the Happy Thanks die set out of Sprout for the shadow, and C9 white glitter paper for the words. I love this glitter paper so much. Before gluing this sentiment onto the card front, I stamped ‘you’re pretty rad-ish’ on white cardstock in Parsley ink. I cut this out with the sign die from the last card and trimmed it down a little. Once I had the sub greeting figured out, I glued it down, then glued the ‘thank you’ on top of it.
To finish the card off, I added some die cut radishes to really drive the sentiment home. I die cut the radish out of Honeysuckle cardstock and added some Cranberry ink to it for some extra depth and dimension. The leaves were die cut out of Sprout cardstock and I added Evergreen ink to the leafy portion for dimension as well. I assembled the veggies and glued them on.
Happy Thanks Bundle
This bundle is awesome! I am a lover of word dies, and these two are no exception. Not to mention, a wonderful stamp set is included with lots of supporting greetings. I love how multipurpose the word dies can be, as well as the sub greetings. The ‘oh happy day’ is perfect for so many occasions— birthdays, babies, promotions, you name it! And I love the variety of sub greetings for the ‘thank you’, it really helps to drive your sincerity home.

I think this card might just my favorite out of the four I made this week. The color palette is perfection— I stamped each turn of the Exclamations Turnabout stamp in Sea Glass, Ballet Slipper, Honeysuckle and Midnight inks. Aren’t these colors perfect together, and perfect with this Turnabout?! I love the soft and dreamy look of it. Since this background had exclamation points all over it, what better use is it than paired with the ‘oh happy day’ word die? I die cut the shadow die out of Sea Glass cardstock and cut the word portion out of Midnight, Ballet Slipper, Honeysuckle, and C9 gold glitter. I used the Midnight as the outline for the words (I also chose to use the fall out and glue it in to make the Midnight section really solid), the Ballet Slipper portion for the ‘oh’, gold glitter for ‘happy’ because that paper looks so happy, and the Honeysuckle portion for ‘day’. I love the ombre-like look that this accomplished. To finish the card off, I die cut some stars using the star die from the Exclamation die set out of the same C9 gold glitter paper and glued them down.
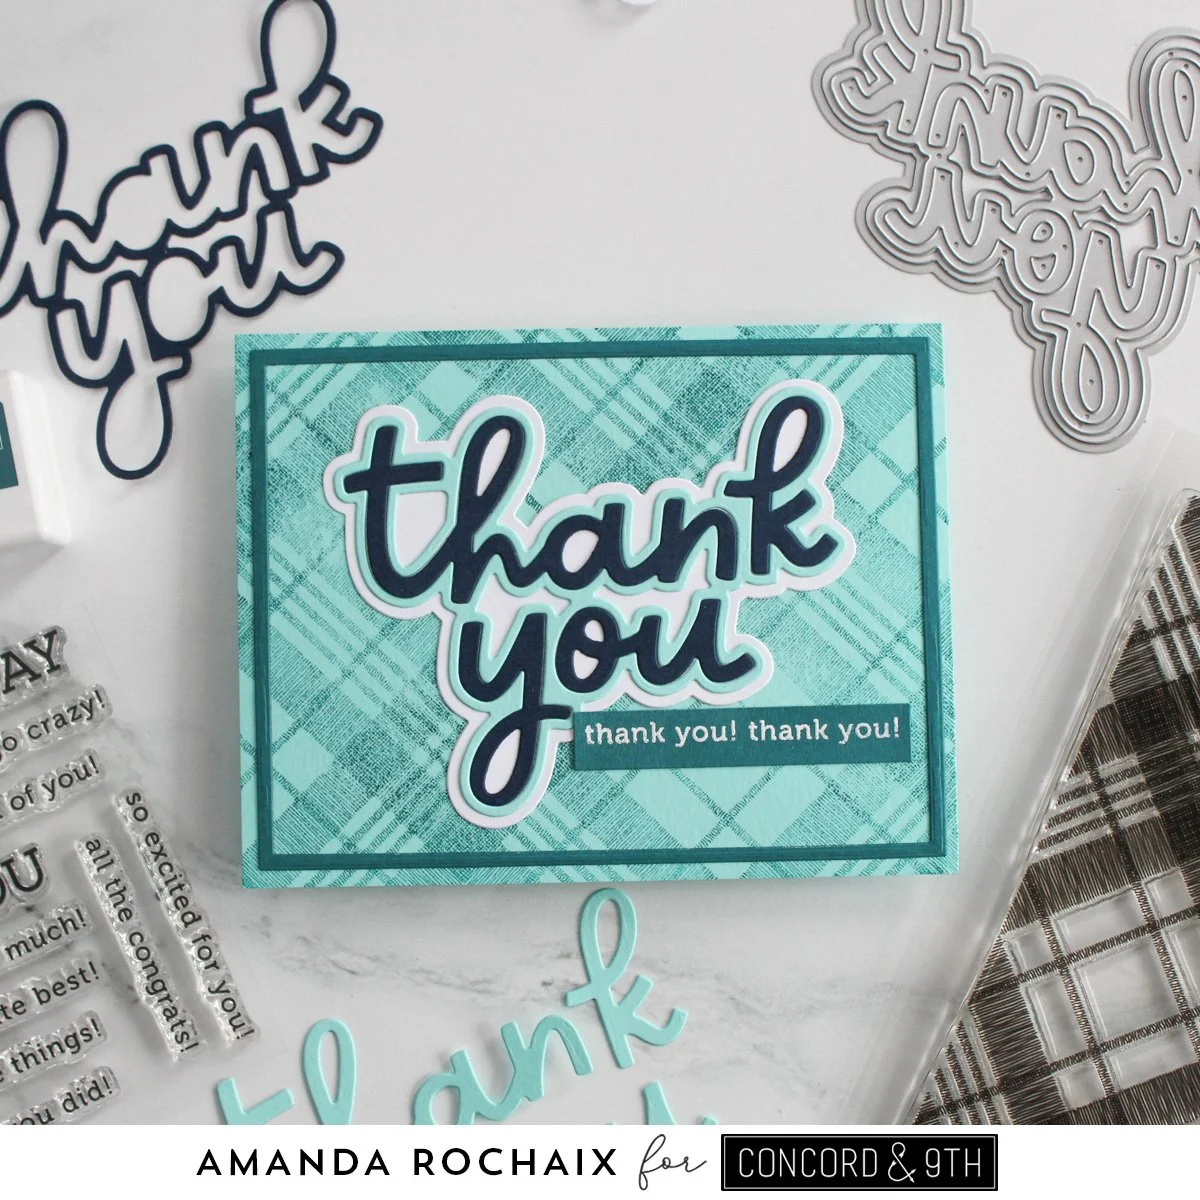
This last card is clean, simple, and sorta leans a little masculine (though it definitely can be for anyone who loves the color blue and plaid!). I started this card off by using the Woven Plaid background stamp and stamping it with Peacock ink on an Aqua Sky card front. This turned out so so pretty, I love it! I’ve really been getting into plaids lately, and this is no exception. The texture on it is so fun and makes it feel so cozy. After not knowing if I wanted to cut the panel down and pop it on a white card base, I decided to make a Peacock frame with two nesting rectangle dies in order to really punch up that Peacock color. For the sentiment, I die cut the shadow die of the ‘thank you’ out of plain white cardstock. I die cut the words out of Midnight and Aqua Sky, used the Aqua Sky as the outline and the Midnight for the words. With the exception of white, I went pretty monochromatic with this card. To finish it off, I white heat embossed a sub sentiment on Peacock cardstock and glued it off to the side. To be honest, I’m not so sure how I feel about this card since to me it feels a little lackluster (I thought about adding enamel dots, but hadn’t at the time), but at the same time it’s a little different from my usual style so maybe that’s okay.
I hope you liked seeing what I’ve guest designed for Concord & 9th this month! I had an absolute blast doing this, and I hope I shared some inspiration with you 😊. Do you have a favorite out of what I’ve shared this month?!
Well, I will catch you next week with some Christmas content, so keep your eyes peeled for that!