

Concord & 9th Feature Friday: Exclamations Bundle, In the Meadow Bundle, and Plaid Turnabout

Hi, friends! Welcome back to the blog!
I’m so excited to share today that Concord & 9th has asked me to be a guest designer for the month of October! 🎉 Let me tell you, I did not expect this opportunity at all (though I have dreamed of it haha), and when I got a message from C9 I was running and screaming (excitedly) from my craft room all the way up to my husband’s office in our loft to share the news. I think it’s fairly obvious how much I love Concord & 9th’s products, so I’m very honored to be working with them this month, and so excited to be designing alongside Seeka (@skypaperscissors) and Veronica Zalis (@veezalis), so stop on by the C9 blog to see their projects or check out their Instagram accounts! And just as a disclaimer, I was gifted this product to design with, but as always, the opinions I share are my own. Supplies used on these cards are Concord & 9th products with the exception of embossing powders, which are from Brutus Monroe.
This (long) blog post will be focusing on three products this week— the Exclamations Bundle, the In the Meadow Bundle, and the Plaid Turnabout. If you know me, you know I love a good Turnabout, and this release is filled with three! These products were so fun to play with and can be very multipurpose which is important to me as I try to spend more purposefully. So, without further ado, here are the details!
Exclamations Bundle
First off, let me just say that I love this Turnabout! It’s so fun and playful but can be incredibly multipurpose, especially with the dies included in this bundle, or mix and matched with your stash. The three cards I made with this bundle all have different feels to them, and I love it. You get different vibes just by changing colors of your inks, the cardstock you stamp on, or how you use the secondary stamps in the set.
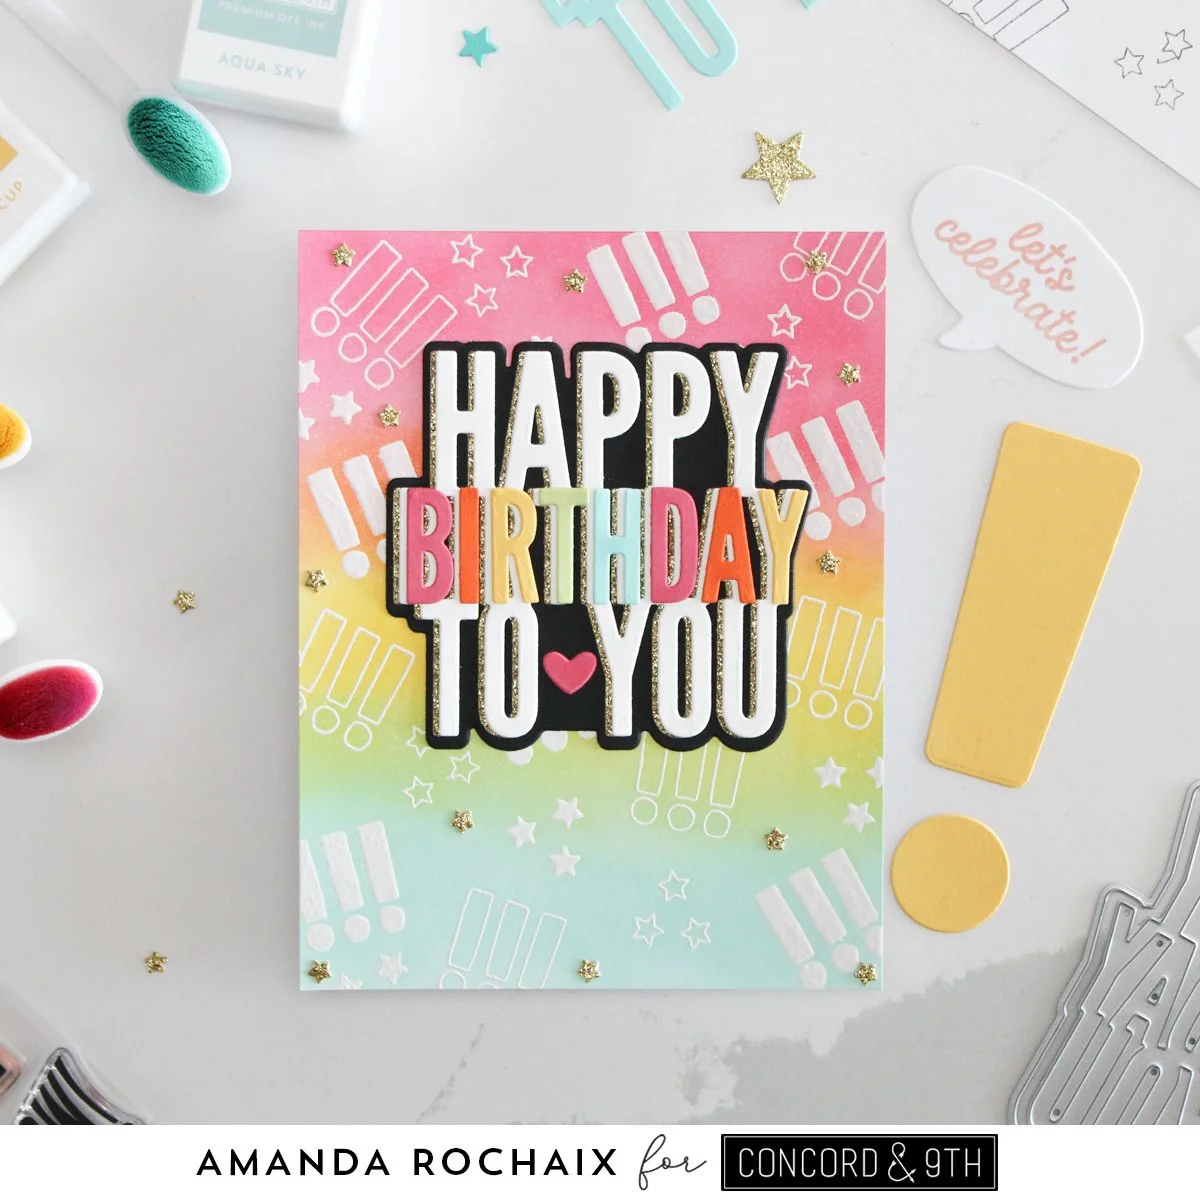
To make this card, I stamped out a pattern using the secondary stamps in the Turnabout set. I did this on a scrap piece of paper so I wouldn’t mess up my piece of white C9 cardstock (this stuff is my absolute holy grail, especially if you are ink blending!). Once I had the pattern to my liking, I had an easy template to follow to stamp and heat emboss. You might notice that some of my heat embossing doesn’t look super even, and that’s because when I stamped out my pattern on scrap paper, I used black ink and my stamps weren’t perfectly cleaned so I hit the trouble spots with an embossing ink pen and re-embossed. The originial didn’t look too bad, but I can be a perfectionist, so it drove me nuts and I covered it.
Once the embossing was dealt with, I moved on to the show stopper—the ink blending 🤩. If I told you I achieved this rainbow with only three ink colors, would you believe me? I did, and I used Honeysuckle, Buttercup, and Aqua Sky inks. I started blending with Buttercup in the middle of the panel to ensure that I would have a thick enough blend to create some beautiful transitions. Once I had enough Buttercup on the panel, I blended on Aqua Sky and worked the color up. I repeated this process with Honeysuckle and finished off the rainbow.
For the greeting, I die cut the ‘happy birthday to you’ shadow out of black cardstock, and cut the word die out of C9 gold glitter and white cardstocks. I used the slim ‘birthday’ die to cut out letters in Honeysuckle, Marmalade, Buttercup, Sprout, and Aqua Sky so that it would play into the background. I glued the gold glitter words as a drop shadow to the white letters, and repeated the same process with the colorful letters. I finished the greeting off with a heart from the Rain or Shine die set, and added a little sparkle by die cutting the little stars die from the die set. This die would make great shaker fill! I was thinking of making the exclamation dies into a shaker card but didn’t get to it.

Now this card is wild. While making it I did ask myself a few times “is this too much?”. However, I do love the playful, happy vibe of this card. To me, I see this card as one to give to a kid who had a rough week at school, or maybe they passed a huge test. Just something that would be a great morale booster.
I stamped all four turns of the Turnabout in Buttercup, Honeysuckle, Marmalade, and Oceanside. For the die cut elements of this card, I stuck to the same color palette. I used dies from the Exclamations bundle as well as dies from the Hip Hip Hooray die set that was released earlier this year. I also included some gold glitter paper on this card to bring some sparkle to it, and I love the accent that it became!

I love how this sweet birthday card turned out! One of my favorite things to do with Turnabouts is to stamp them on colored cardstock. Stamping them on white cardstock is great and gives you so many possibilities for color combinations, but sometimes the white space drives me crazy/can feel distracting to my eyes. Colored cardstock is always my solution to that! Here I stamped on Ballet Slipper cardstock and stamped in Ballet Slipper and Grapefruit ink, as well as white and rose gold heat embossing (these are from Brutus Monroe). I really wanted this card to have a soft vibe to it, so I stuck to the pinks family.
For the sentiment, I used the big ‘yay’ from the Hip Hip Hooray die set— I think this greeting is perfect for this Turnabout! I die cut the shadow out of C9’s rose gold foil paper, and the letters out of Ballet Slipper and Grapefruit cardstock. To add a little bit of detail, I stamped and heat embossed the dots on the letters in the same rose gold embossing powder.
After going back and forth on the sentiment, I stamped ‘happy birthday’ from the Petal Pushers stamp set in Grapefruit ink on a 5/8-inch-thick piece of plain white cardstock. Before settling on this, I did have ‘let’s celebrate’ and ‘so excited for you!’ which could have made this a card for any purpose— birthday, job promotion, baby girl gender reveal/shower card, you name it!
Plaid Turnabout
This Turnabout is so sweet! It makes a perfect pair with the Plaid Turnabout stamp that C9 released last month. You can create such versatile backgrounds for any occasion with this Turnabout, or you can even die cut out of a panel.
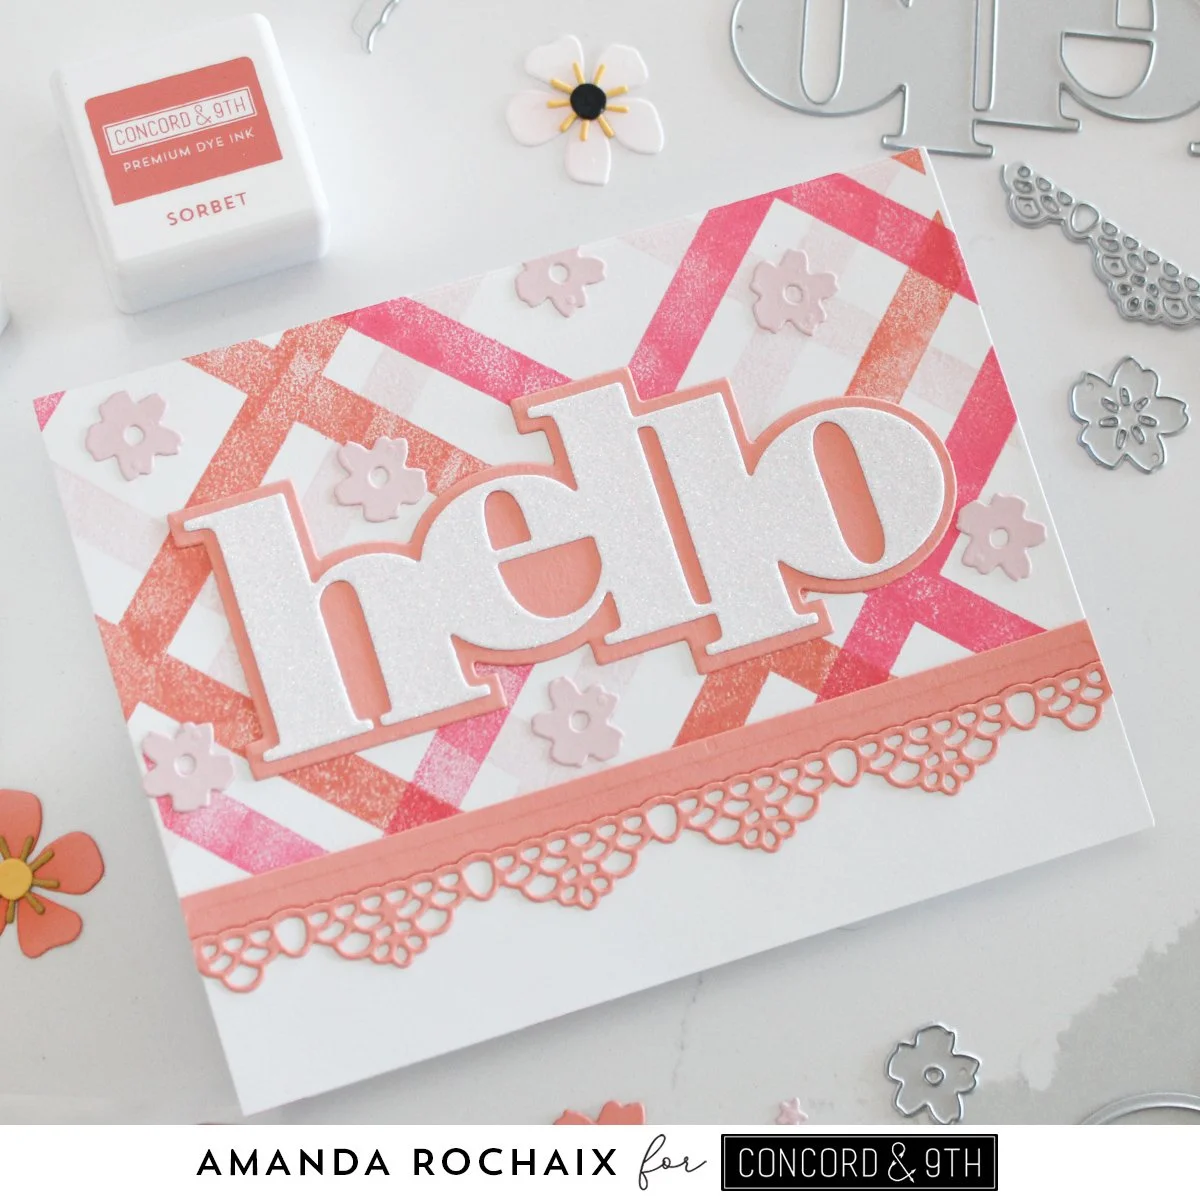
With this card I was going for a soft and sweet vibe. Since the name of this Turnabout was Picnic Plaid, I really had spring stuck in my head as inspiration (though this stamp is not locked into just one season/purpose!). I stamped three turns of the Turnabout in Ballet Slipper, Sorbet, and Honeysuckle, then cut the 6x6 piece down to A2 size. I picked up the Lace Border dies this past summer and hadn’t gotten around to using them yet, so I really wanted to incorporate them into this project. I cut a piece of plain white cardstock to 1.5 x 5.5 and glued it on the bottom of the card front. I die cut the smaller lace border and the deckled edge out of Grapefruit cardstock and glued them down at the edge of the white cardstock.
For the greeting, I die cut the shadow layer of the big ‘hello’ from the Everyday Sayings die set out of Grapefruit cardstock, and the words out of C9 white glitter paper. I absolutely love this glitter paper, it’s my favorite of any I’ve used, and I wholeheartedly recommend that every crafter should have some! Once the greeting was glued down, I used the smaller floral die from the In the Meadow die set and die cut it out of Ballet Slipper cardstock and glued them around the ‘hello’.
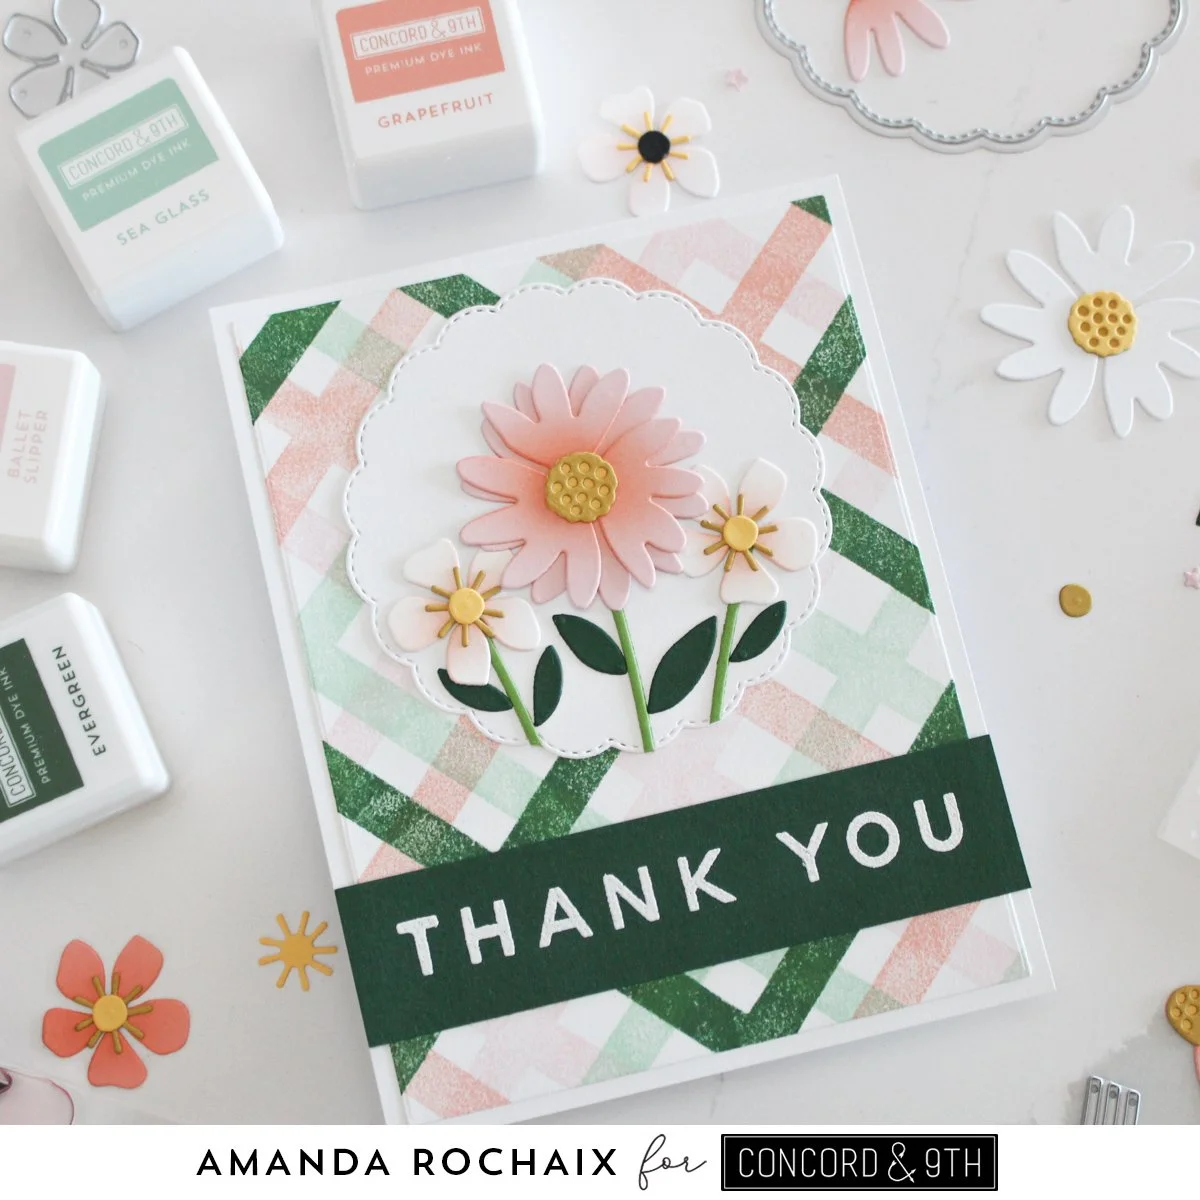
I love this thank you card! That could be because the Turnabout is stamped in some of my favorite colors, or it could also be because there’s a floral element 😍. I stamped the first turn in Ballet Slipper, then Sea Glass, Grapefruit and Evergreen, and man, do I love this color combination! I cut the Turnabout panel down to an A2 size, then decided I wanted to have a thin white mat to it, so I cut off 1/8th of an inch on each side. I die cut the scalloped circle die from the Grateful Blooms die set out of white cardstock and decided to use it as the main focal point of the card.
I used two floral dies and the stems and leaves dies from the Petal Pushers die set and created a little floral scene to go on top of the scalloped circle. I die cut the largest flower out of Ballet Slipper cardstock and blended Grapefruit ink on the center of the flower to add some definition. I die cut the flower centers for all the flowers out of Stardust and Buttercup cardstocks. The smaller flowers were die cut out of C9 white cardstock with Ballet Slipper ink blended on them, the stems were cut out of Parsley cardstock, and the leaves out of Evergreen. Lastly, I finished the card off with a chunky sentiment that spanned the whole card. I white heat embossed the ‘thank you’ from the Petal Pushers stamp set on Evergreen cardstock and glued it down.
I did play around with using a butterfly in the scalloped circle from the Bold Butterflies stamp set, but changed my mind at the last minute. If you have that stamp set, this combo is so cute!
In the Meadows Bundle
Last up is our final Turnabout stamp in this release. I love florals, so I was excited to see that Concord & 9th came out with another floral Turnabout! This one is so sweet and I love that the scale is small enough that you can die cut things out of a Turnabout panel and it will look great! I almost made a card with balloons that I die cut out of the dark purple version of this card.
I can tell you that this card resulted in some frustration. My first attempt of this card was ink blending some Eggplant ink over a white heat embossed panel with all 4 turns of the Turnabout stamped. Once the whole panel was inked to my liking, I went to buff off the ink from the white embossing, but it was stained pink and incredibly stubborn. I realized that I should have expected it to stain since Eggplant does stain my stamps each time (much like other red/pinks). So, take 2 was ink blending on a panel with Eggplant ink, then clear embossing all four turns of the Turnabout over it. This gave me a worse, less noticeable result then the stained one.
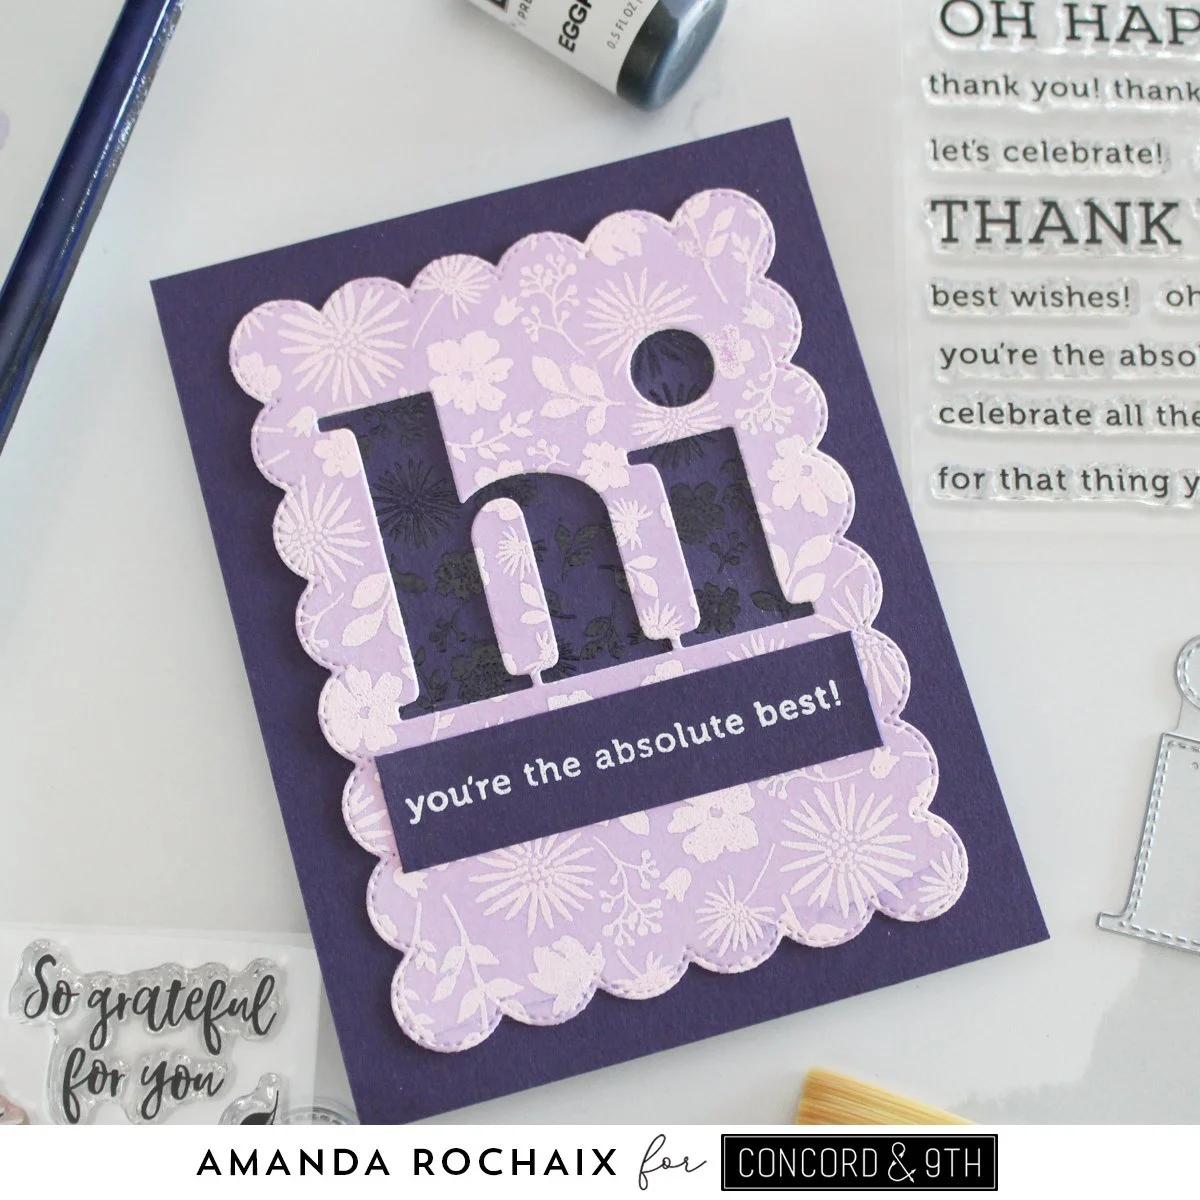
At this point I was frustrated and decided to clear heat emboss all four turns on Eggplant cardstock, which turned out beautifully. I was ready to pivot to that design, but I really wanted a lighter purple. I decided to take out my Eggplant re-inker and to watercolor with it. I white heat embossed all four turns of the stamp on some Canson XL watercolor paper (I chose this one since it has less texture than my better quality paper, that way stamping would be easier). Once the embossing was cool, I got to work painting. This resulted in a beautiful light purple background, but there was still some staining on the embossing once I wiped it off. I decided I could live with it at this point, and I moved on.
I die cut my watercolored panel with the scalloped rectangle from the Simply You die set. I used the medium sized ‘hi’ from the Everyday Sayings die set and I cut it out of the middle of the panel. I matched up the pattern on the clear heat embossed Eggplant panel with the pattern of the light purple panel so there would be a double punch of florals on this card. Once I had the scalloped panel glued to the Eggplant card front, I went to work on a sub greeting. I stamped and white heat embossed ‘you’re the absolute best!’ from the Happy Thanks stamp set on Eggplant cardstock.

This card was my bonus card! Once I die cut the ‘hi’ out of the panel on the last card, I just had to make a card with it. I started this card off by using the Double Stripe card front die on a piece of white cardstock. I used the same scalloped rectangle die as the last card and die cut it out of white cardstock, then lined it up to die cut off 3 rows of scallops to turn it into a square.
I glued down the ‘hi’ and got to work on adding some florals to this card with the In the Meadow die set. I die cut the large purple flower out of watercolor paper I painted with the Eggplant re-inker. The smallest flowers were die cut out of Grapefruit, and the medium sized onese were cut out of Ballet Slipper. The greenery was cut out of Parsley and Sprout. I Frankenstein-ed the large leafy die cuts together to make a swag, then filled the space up around it to cover the seam. I love how fresh and clean this card turned out!
That wraps up these cards and this week’s Feature Friday! Do you have a favorite?! I hope to share some other projects before next week’s Feature Friday, but if I don’t, I hope to catch you again next week!😊