

Concord & 9th—Elegant Floral Easter Card
Happy Saturday, Crafters!
Today I’ve got an elegant floral Easter card for you! This one is super quick to create and features a couple products from different companies.
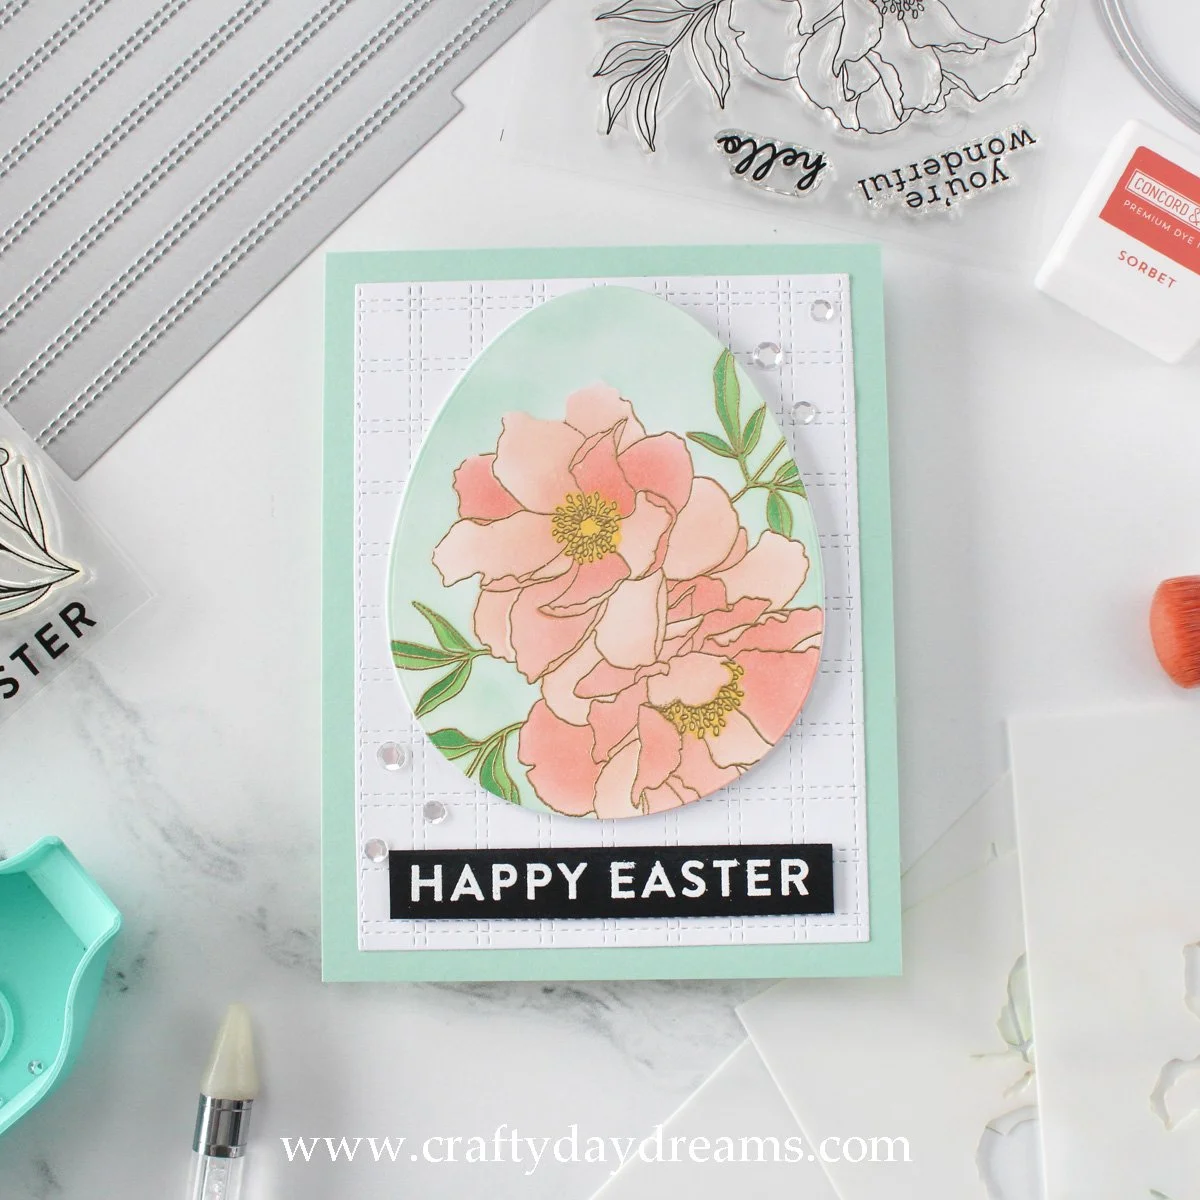
The inspiration behind this card came from some painted Easter eggs I saw on Pinterest. For some reason, all I could think of after seeing that pin was a piece of art (can’t remember the name of it for the life of me) that had a jade/blue background and cherry blossoms on it. With that inspiration in mind, I pulled the Blended Petals stamp set and stencils out of my stash. I picked out one of the larger egg dies from the Essential Eggs die set from Ellen Hutson and die cut it out of Concord & 9th white cardstock since I was going to be doing some ink blending.
I figured out that I wanted the orientation of the flowers to have the smaller flower facing up, and in doing so, it allowed more greenery to show on the egg. I stamped and gold heat embossed the floral in Gilded embossing powder from Brutus Monroe (though I noticed my stamp didn’t make contact in one spot, I thought it was going to be covered up with a greeting at one point so I didn’t fix it). Once the embossing was cool, I got to work on stenciling. I used the more detailed floral stencils to blend on Grapefruit and Sorbet inks, Buttercup ink for the flower centers, and Parsley and Evergreen inks for the leaves. In the Blended Petals stencil pack, there is a mask for the large florals, so I pulled that out and stuck it down on top of the florals with some repositionable adhesive. With the mask in place, I blended on Sea Glass ink in the background. I love how this egg turned out!!
With the egg completed, I went to work on the rest of the card. For the sentiment, I decided to use the ‘happy Easter’ sentiment from the Easter Joy stamp set from Simon Says Stamp. I white heat embossed this on C9 black cardstock and cut it out with a sentiment strip.

For the background, I pulled out the Double Stitched Stripe card front die from Concord & 9th and ran it through my die cut machine both ways on the same piece of white cardstock. I like that this almost gives a basketweave kind of vibe. After a bit of thinking (and asking my husband), I cut down the white panel a 1/4-inch on each side and matted it on an A2-sized piece of Sea Glass cardstock. Once I did this, I wasn’t sure if it was the right decision (maybe I should have done a 1/8-inch border instead, or left the stitched panel full), but overall I like how this card turned out!
I popped the egg up on foam tape and the sentiment strip up on some thin black foam squares and stuck them down. From Cathy Zielske, I learned to put some glue on my foam tape to give a little bit more time to adjust things before the foam tape truly sticks. This has been saving my life for months now, and if you aren’t doing it, I highly suggest it!
To finish this card off, I took out the same sequins I used on the last card and created two groupings of three. I love what these sequins bring to this card! Though I almost wish the egg was just a teeny bit smaller to make this card feel a little more balanced.
Well, that wraps up my Easter cards for this year! Hopefully next year I get an earlier start of them and can make a couple more. If you’re celebrating the holiday, I hope you have a great one! Until next time! 😊