

Simon Says Stamp— Talk Bubbles ‘Hi’ Card
Hello, Crafters!
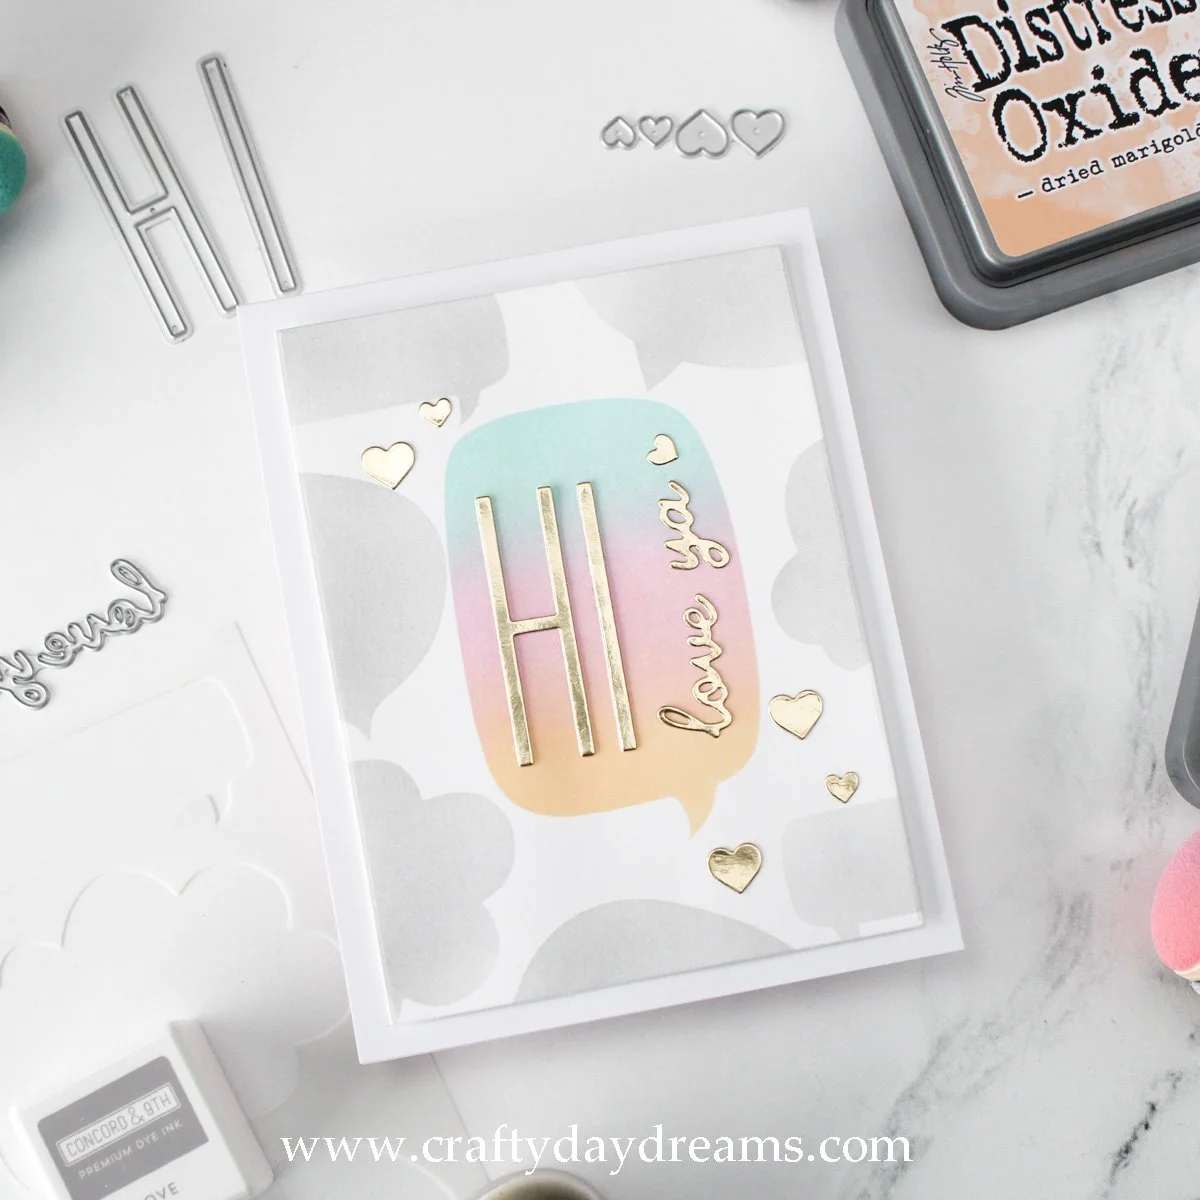
Welcome back to the blog! Today I have another quick card to share. In October 2021, I picked up the So Talkative Simon Says Stamp card kit and hadn’t gotten around to using much of it besides a couple of sentiments from the stamp set. Well, I finally used another part of that kit! It only took me a year and a half 😅. Anyways, I was scrolling through my Pinterest inspiration board when I stumbled up a card Kristina Werner made with the Talk Bubbles stencil from that kit. When I saw that, all I could think of was a fun colored center talk bubble and a bunch of light grey bubbles in the background. So I got to work on just that.
I started off this card by planning out my talk bubbles because I was not in the mood to go into this with guns blazing. So I took a scrap sheet of paper and cut it down to 4.25 x 5.5 and I lined up the large vertical talk bubble and traced that onto the center of my paper. I played around with the rest of the talk bubbles to fill in the rest of the space while flipping the orientation of the stencil as I saw fit. After tracing all the bubbles and liking what I had going on, I got ready to start blending.
I cut a piece of Concord & 9th white cardstock down to A2 size and stuck it down on my glass mat with temporary adhesive. I lined up my template sheet of paper with the C9 one below it, then lined up my stencil to work on the middle talk bubble. I pulled out Salvaged Patina, Kitch Flamingo, and Dried Marigold Distress Oxides and blended them in that order while masking off edges so the rest of my cardstock wouldn’t accidentally get ink on it. This blend is so pretty!
Once that bubble dried a bit and I cleaned off the stencil, I brought my template back in in the same way, and went on about lining up the stencil and blending in the background talk bubbles in Dove ink from Concord & 9th. I really love this soft grey, and I think it suits this card well. I cut down my blended background by a 1/4-inch on each side, added some foam tape to the back of it and stuck it down on a white top folding card base.

For the greeting, I raided my stash and settled on using the Mighty Alphabet dies from Altenew to add a matte gold ‘hi’ to this card. When I was making this card, I found out a family member was feeling a bit bummed out, so I decided I would finish this card off and send it to them. Since I wanted something a little extra for the sentiment, I die cut the ‘love ya’ die from the Just the Ticket die set from Concord & 9th out of the same matte gold cardstock (from SSS). I decided to add some of the hearts from the same C9 die set to this card to give it a little shiny something-something, so I went back to the same gold cardstock and added the hearts to the card front.
All in all, this card isn’t too shabby! I like how quick it came together, yet how impactful it is with that brightly colored talk bubble. I almost wish I cut out the middle talk bubble out of some masking paper so that I could add talk bubbles that looked like they were underneath it, but that can be for next time!
That’s all I’ve got for today, so thanks for stopping by, and I hope to catch you next time! 😊