

Concord & 9th— Blended Petals
Hello crafters!
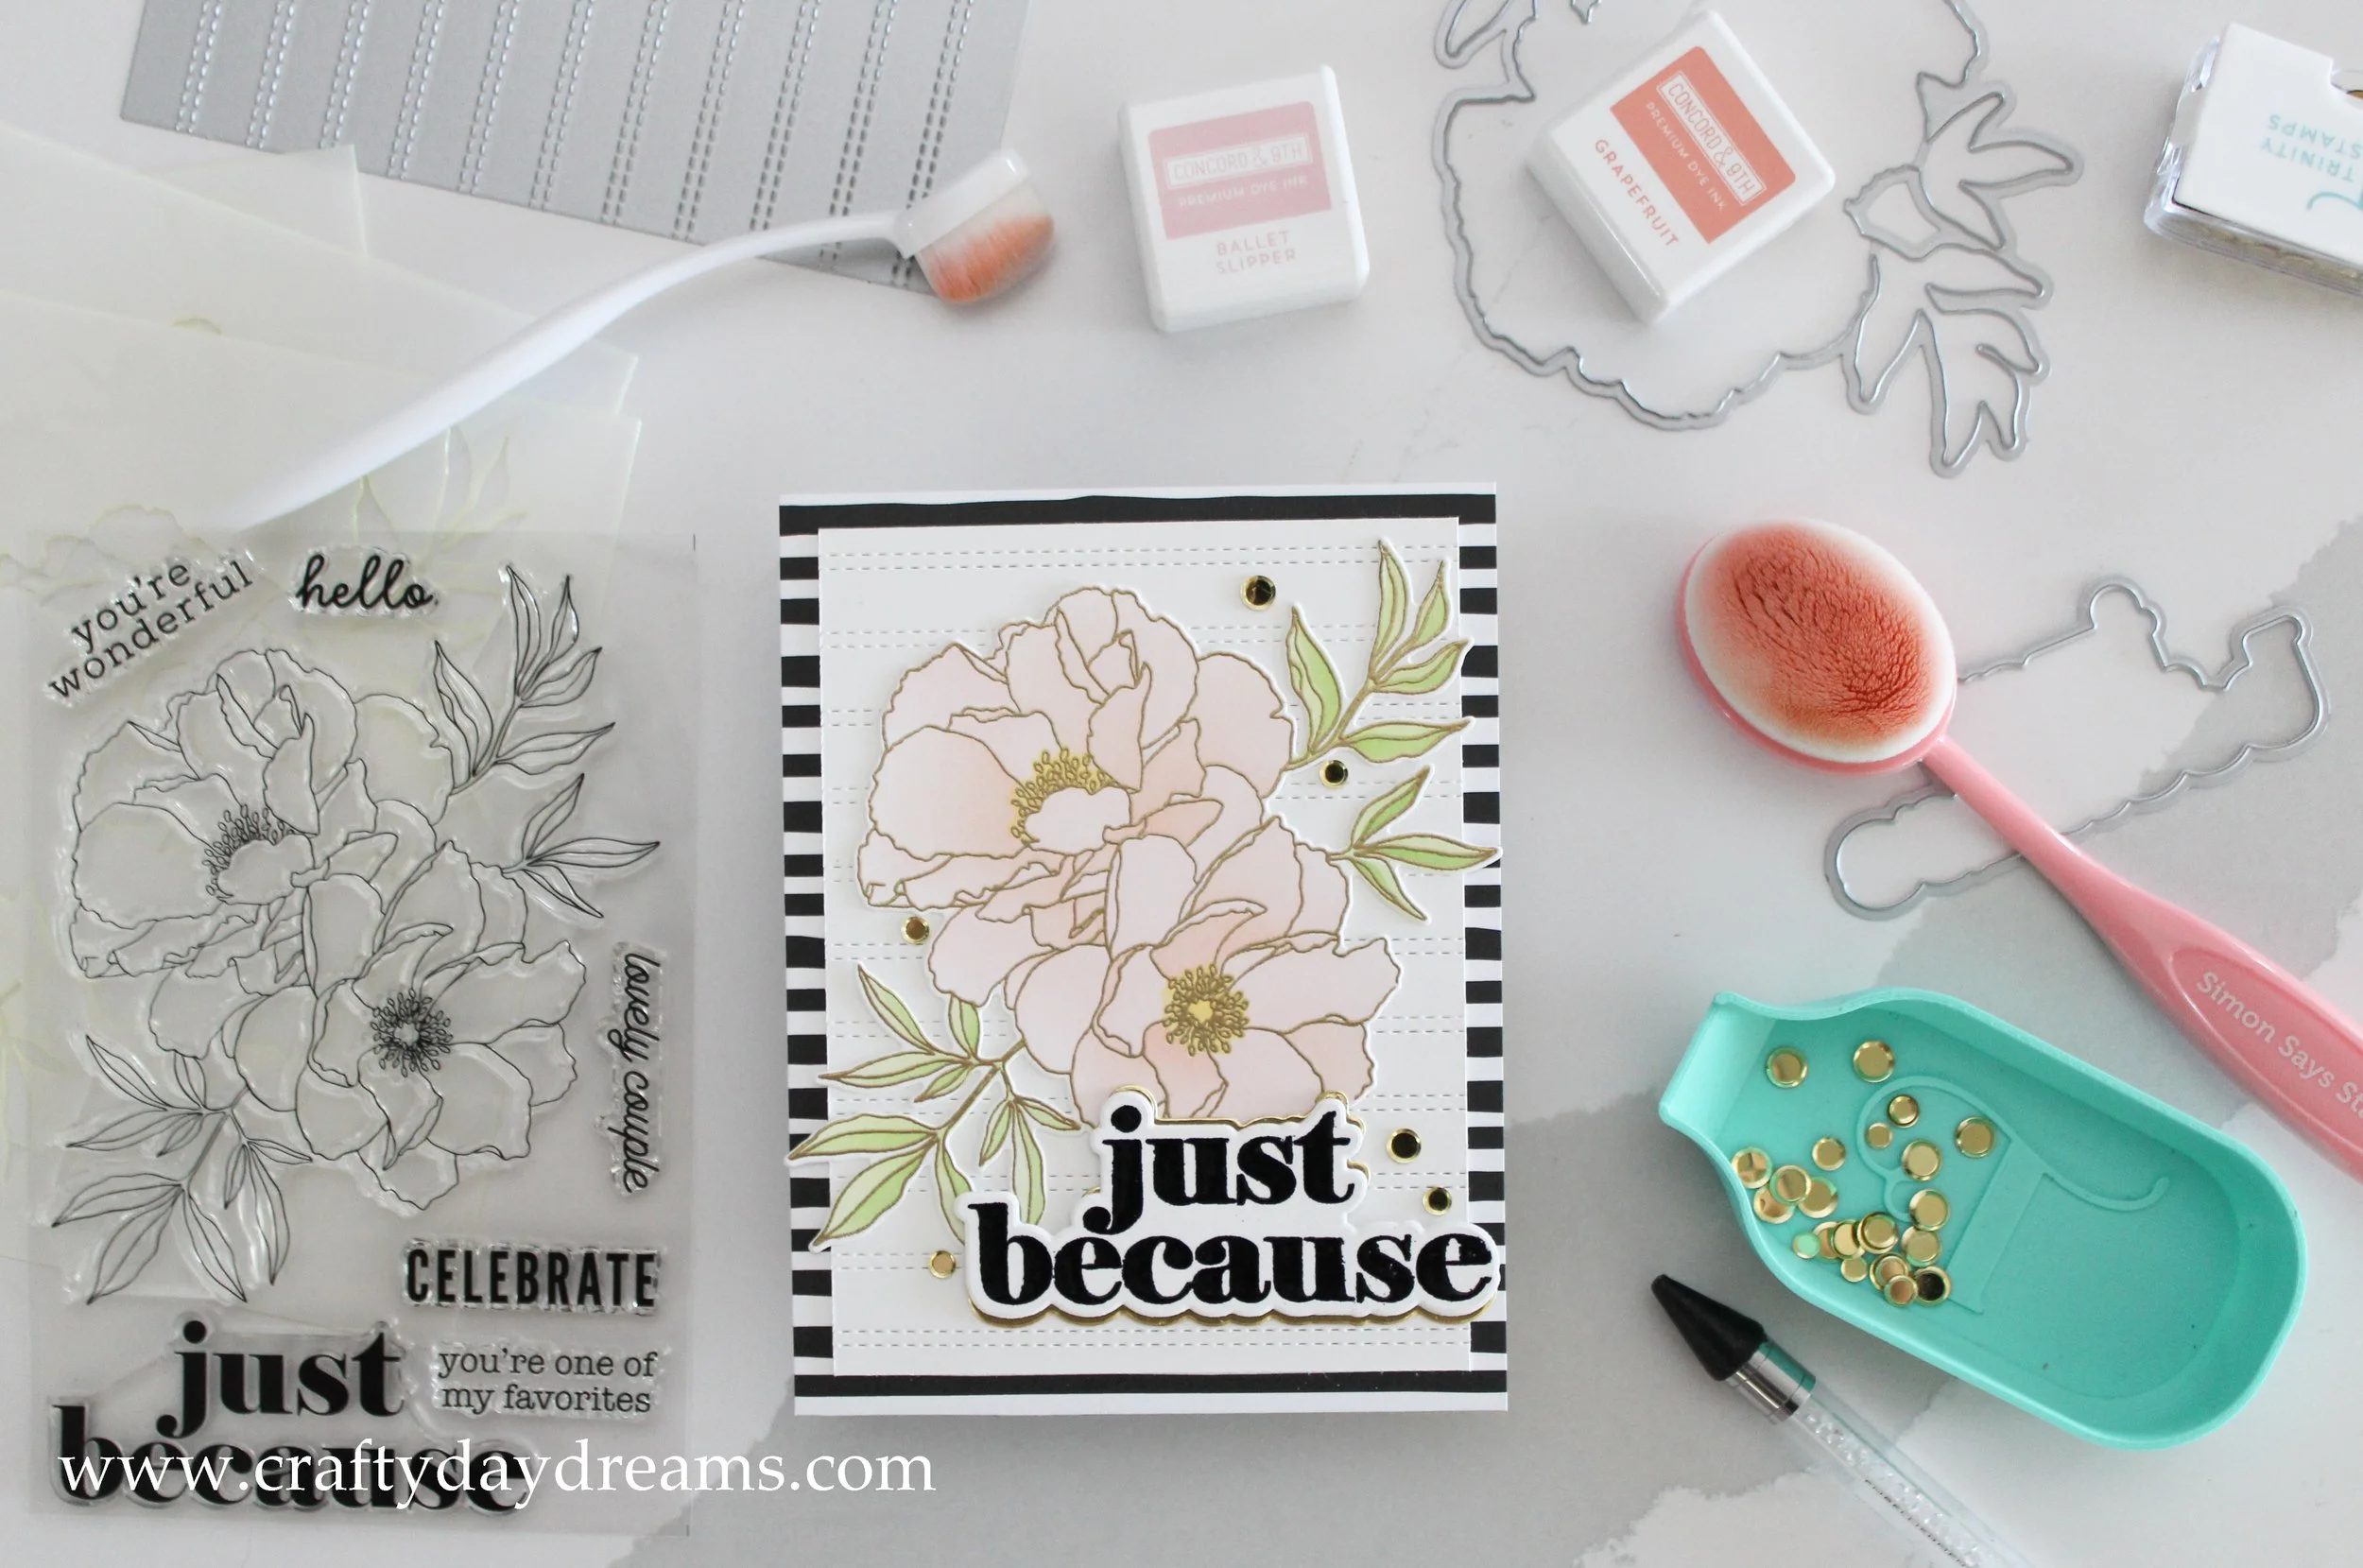
Today I’m sharing this beautiful card I made using the Blended Petals bundle from Concord & 9th. I love that there is a coordinating stencil set to this floral image, it takes all the stress out of coloring and the stencils are thick and high quality.
I started this project off by cutting a piece of 8.5 x 11 in white cardstock from Concord & 9th in half and placed it in my MISTI. I have found out recently that the white cardstock from C9 blends like a dream, so I really wanted to use it for this project. I prepped my cardstock with anti-static powder, stamped it with VersaMark ink, and heat embossed using Gilded embossing powder from Brutus Monroe. I adhered my cardstock to my surface using repositionable adhesive and lined up the first stencil. I used Ballet Slipper ink to blend the floral portion of the two stencils that had leaves on them. I used Grapefruit ink to blend the floral section of the last stencil (it has floral centers on it), and blended the floral centers with Buttercup ink.
After the floral was ink blended, I lined up the stencil with the largest leaf sections to blend on Sprout ink. For these stencils, you have to re-position them when you’re blending the leaves. I’m pretty sure this was designed this way in order to remove the risk of you accidentally blending into the floral section (Greg at C9 mentioned something like this for a class at C9 Summer Camp). After both sets of leaves were blended, I moved on to the next stencil (which has smaller leaf sections) and ink blended Parsley ink to add a bit of dimension to the leaves. Once I was done blending, I used the coordinating die to cut the floral out. I really love how all of these colors look together, it resulted in such a soft floral, and exactly what I was picturing in my head!
I started to work on the card front, and I decided I wanted to use the Double Stripe Card Front Die to add a bit of texture and visual interest, so I took a A2 sized piece of white cardstock and ran it through so that the stripes were horizontal. This die is amazing! I love that they designed it so you could get stripes in both directions (or combined to make a plaid pattern) at the cost of just one card front die! I love the thought that went into it, and I really appreciate being able to get more for your money.
Once I laid the floral on top of the stitched background, I knew I wanted to cut it down and mat it on other cardstock. For some reason, the black and white stripe patterned paper that C9 released in their Garden Party patterned paper pack came to mind right away. I pulled it out and cut it down to A2 size and trimmed the white stitched panel down a 1/4 inch on each side. I glued the white panel onto the stripe background, and the floral onto the white panel.
After these were glued down, I started to work on the sentiment. I decided I wanted to use the large ‘Just Because’ included in the stamp set, so I decided to heat emboss it in Ultra Fine Black from Simon Says Stamp. This embossing powder is beautiful! When you tip the greeting into the light, the embossing looks so glossy and plump that it looks like you used glossy accents over black ink. I ended up having to heat emboss it twice because part of my stamp either didn’t get enough ink on it or there was something covering the top of the last two letters. This resulted in an even thicker and glossier greeting, and I’m very happy with it! I used the coordinating die to cut it out, and to cut out two extra pieces of white cardstock for dimension. Before gluing the sentiment down, I decided I wanted a little bit of extra shine on it, so I used the die again to cut out the ‘because’ portion of some Simon Says Stamp Matte Gold cardstock. This cardstock is a newfound love of mine, it’s so beautiful!
After lining the gold cardstock up to hang out a little from the bottom of the die cut sentiment, I decided I wanted a little on the top too, so I repeated the process as before. After gluing the upper gold shadow on, I added a few paper strips under the sentiment for dimension and added it to the card front. To finish the card off, I added some beautiful gold coin metallic confetti from Trinity Stamps. These sequins look beautiful with the gold heat embossing and the gold around the sentiment.
I hope you liked this card! If you want to see the process in action, check out my reel on Instagram. Thanks for stopping by, I’ll catch you next time!
