

Ellen Hutson—Eclipse XOXO Valentine’s Card
Hi, Crafters! Welcome back to the blog!
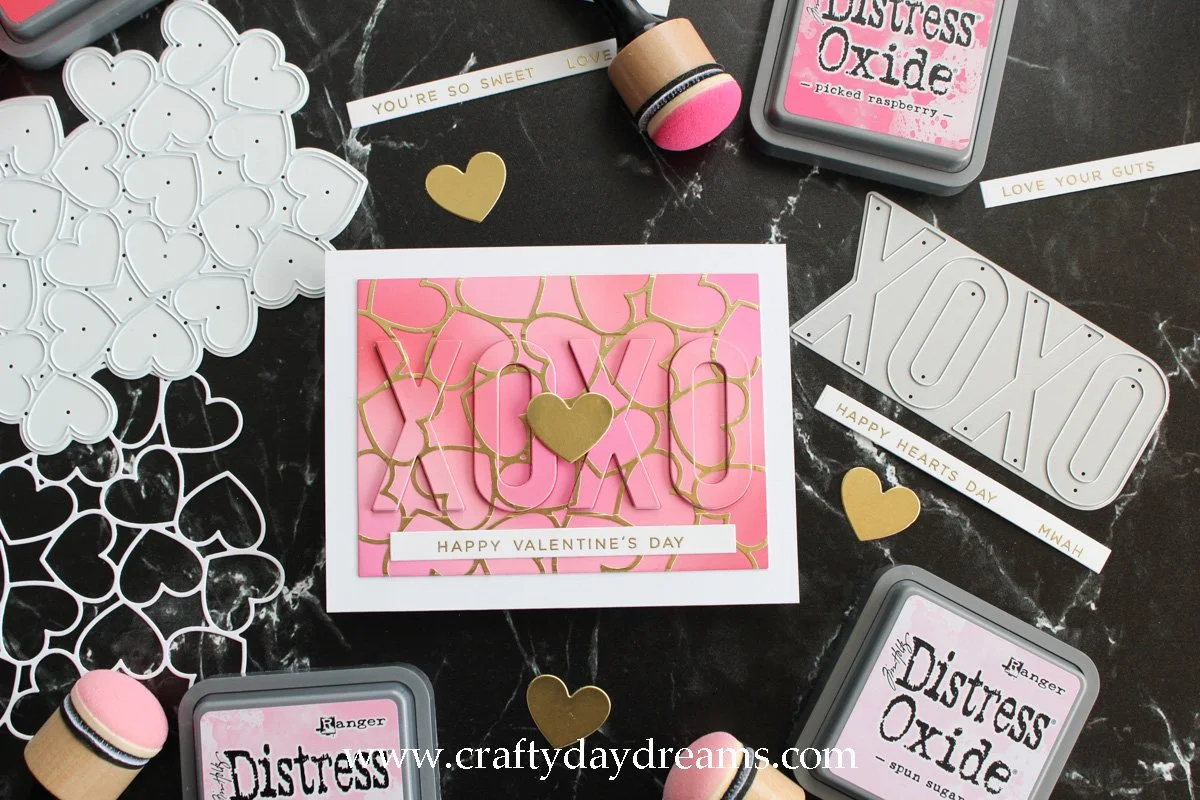
Today I’ve got another fun Valentine’s card for you, this time focusing on the eclipse technique! If you haven’t heard of this technique yet—which might sound intimidating but isn’t! — it involves die cutting a larger die/design out of a panel, then stacking layers of die cuts underneath it to make it seem like it’s popping out of the card front. It can be a really impactful, yet subtle technique, and I really enjoy utilizing it.
So, let’s get started! I pulled out a piece of Concord & 9th white cardstock since I was planning to use Distress Oxides on a background. I pulled out Festive Berries, Worn Lipstick, Picked Raspberry, Kitch Flamingo and Spun Sugar. I had orginally started blending randomly with Worn Lipstick, Festive Berries and Spun Sugar but didn’t like how it was turning out, so if you replicate this project stick to Picked Raspberry, Kitch Flamingo and Festive Berries (or any colors you like)! Luckily with Oxides you can add pigment overtop pigment, so I was able to ‘fix’ my background.
I have a bin on my desk that stores new products or products I want to use, so I incorporated a couple in this project. Since I wanted the Oxide blended background to have more oomph, I used the Scattered Large Hearts die from The Stamp Market and die cut it out of Simon Says Stamp matte gold cardstock. Since I was gluing this on top of my blended panel, I only wanted one layer of this die cut since I would be die cutting this panel again with the XOXO die and too many layers would make that difficult.
At this point, I started thinking about what the rest of my card would look like, how much of a border would I have, and what size should the blended panel be so that the XOXO was to scale? I decided to use my Waffle Flower Nesting Rectangles dies and cut the blended panel down to 3.5 x 4.75-inches. Once this was cut down to size, I lined up the XOXO die from Ellen Hutson as even as possible on each side and ran it through my Platinum 6. Make sure you keep all the fall out after die cutting, you will need it! I cut a piece of plain white cardstock down to the same size as the blended panel and glued it behind it. This will be the base to build my letters up on!
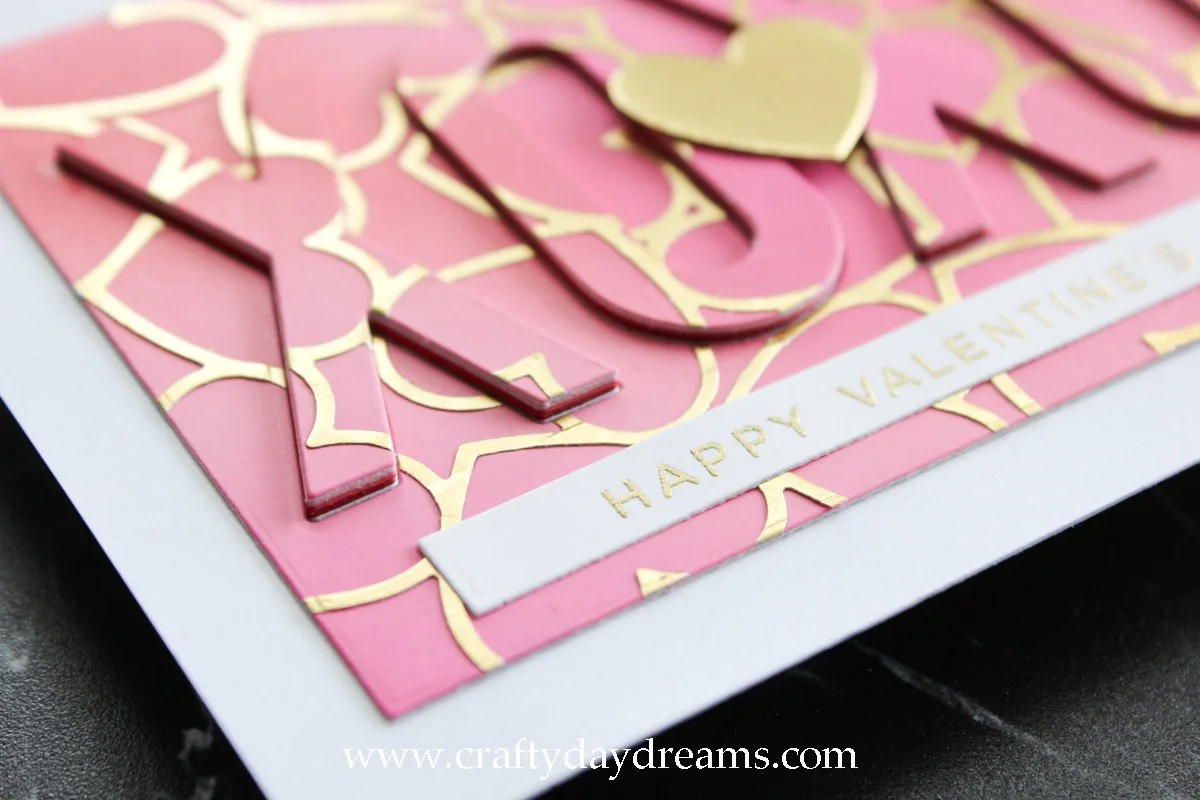
Now for the building: I die cut two layers out of white cardstock, then one each out of Cranberry, Poppy, Honeysuckle and Ballet Slipper (all Concord & 9th colors). So in total my letters would be 7 layers thick including the top patterned layer. You can make your letters as thick as you want—if you want less dimension, go for it! I went a little extra here because I liked the idea of some subtle color coming from the colored cardstock layers. To start building up the letters, I glued down the first white layer. Once this layer was adhered, I glued down the inner “O” fall out, making sure I had the right one and it positioned in the right direction. That is the most difficult part of doing an eclipse technique—once you have your base layer, it’s smooth sailing! I followed the rest of the order I mentioned earlier and completed the letters.
At this point, I was ready to add a subsentiment. Another excellent product I picked up from the Essentials by Ellen Valentine’s release this year is the Valentine Vibes stamp set. This stamp set is amazing! It has 27 sentiments on it, as well as some bonus line stamps, that can be cut with a coordinating die. I really like these stamp sets for the variety of sentiments you get, and the fact that the die that cuts them out coordinates with their other stamp sets they have released like this! Since I was planning to mount my blended panel on a white card front, I decided to gold heat emboss this stamp set on Concord & 9th white cardstock. Part of the reason I chose the C9 cardstock was because it’s great for blending, and if I wanted a different colored sentiment strip, I could blend any inks over what I have and be good to go!

After a bit of internal debate, I decided to glue my sentiment strip below the XOXO so that the eclipse technique would really pop. Since I wanted to add a bit of a finishing touch to the card front and didn’t really want to get my sequins out, I used one of the fall out hearts from when I cut out the Large Scattered Hearts die. These hearts are the perfect shape, I can’t wait to use them on other projects!
Well, that wraps up today’s blog post! I hope you liked this card! I always have fun putting together eclipse technique cards, it can be very therapeutic. Thanks for stopping by today, and I hope to catch you next time with more inspiration!