Concord & 9th— Tiny Trees Turnabout Stamp 3 Ways
Welcome back to the blog, and happy Christmas in July!
It’s crazy to think we’re almost 5 months out from Christmas, but I’ll take any excuse to get in the spirit! Today’s post kicks off the start of some Christmas cards that I’ll be sharing during the rest of the month (likely with some non-Christmas content mixed in) using the Tiny Trees Turnabout Stamp from Concord & 9th. This stamp and the bonus stamps in the set are amazing. I love the pattern and that it has such a variety of trees, the styles are so stinkin’ cute! If you’re not familiar with how to use Turnabout stamps, I’ll link to a video with instructions here to get you started.
Retro Christmas
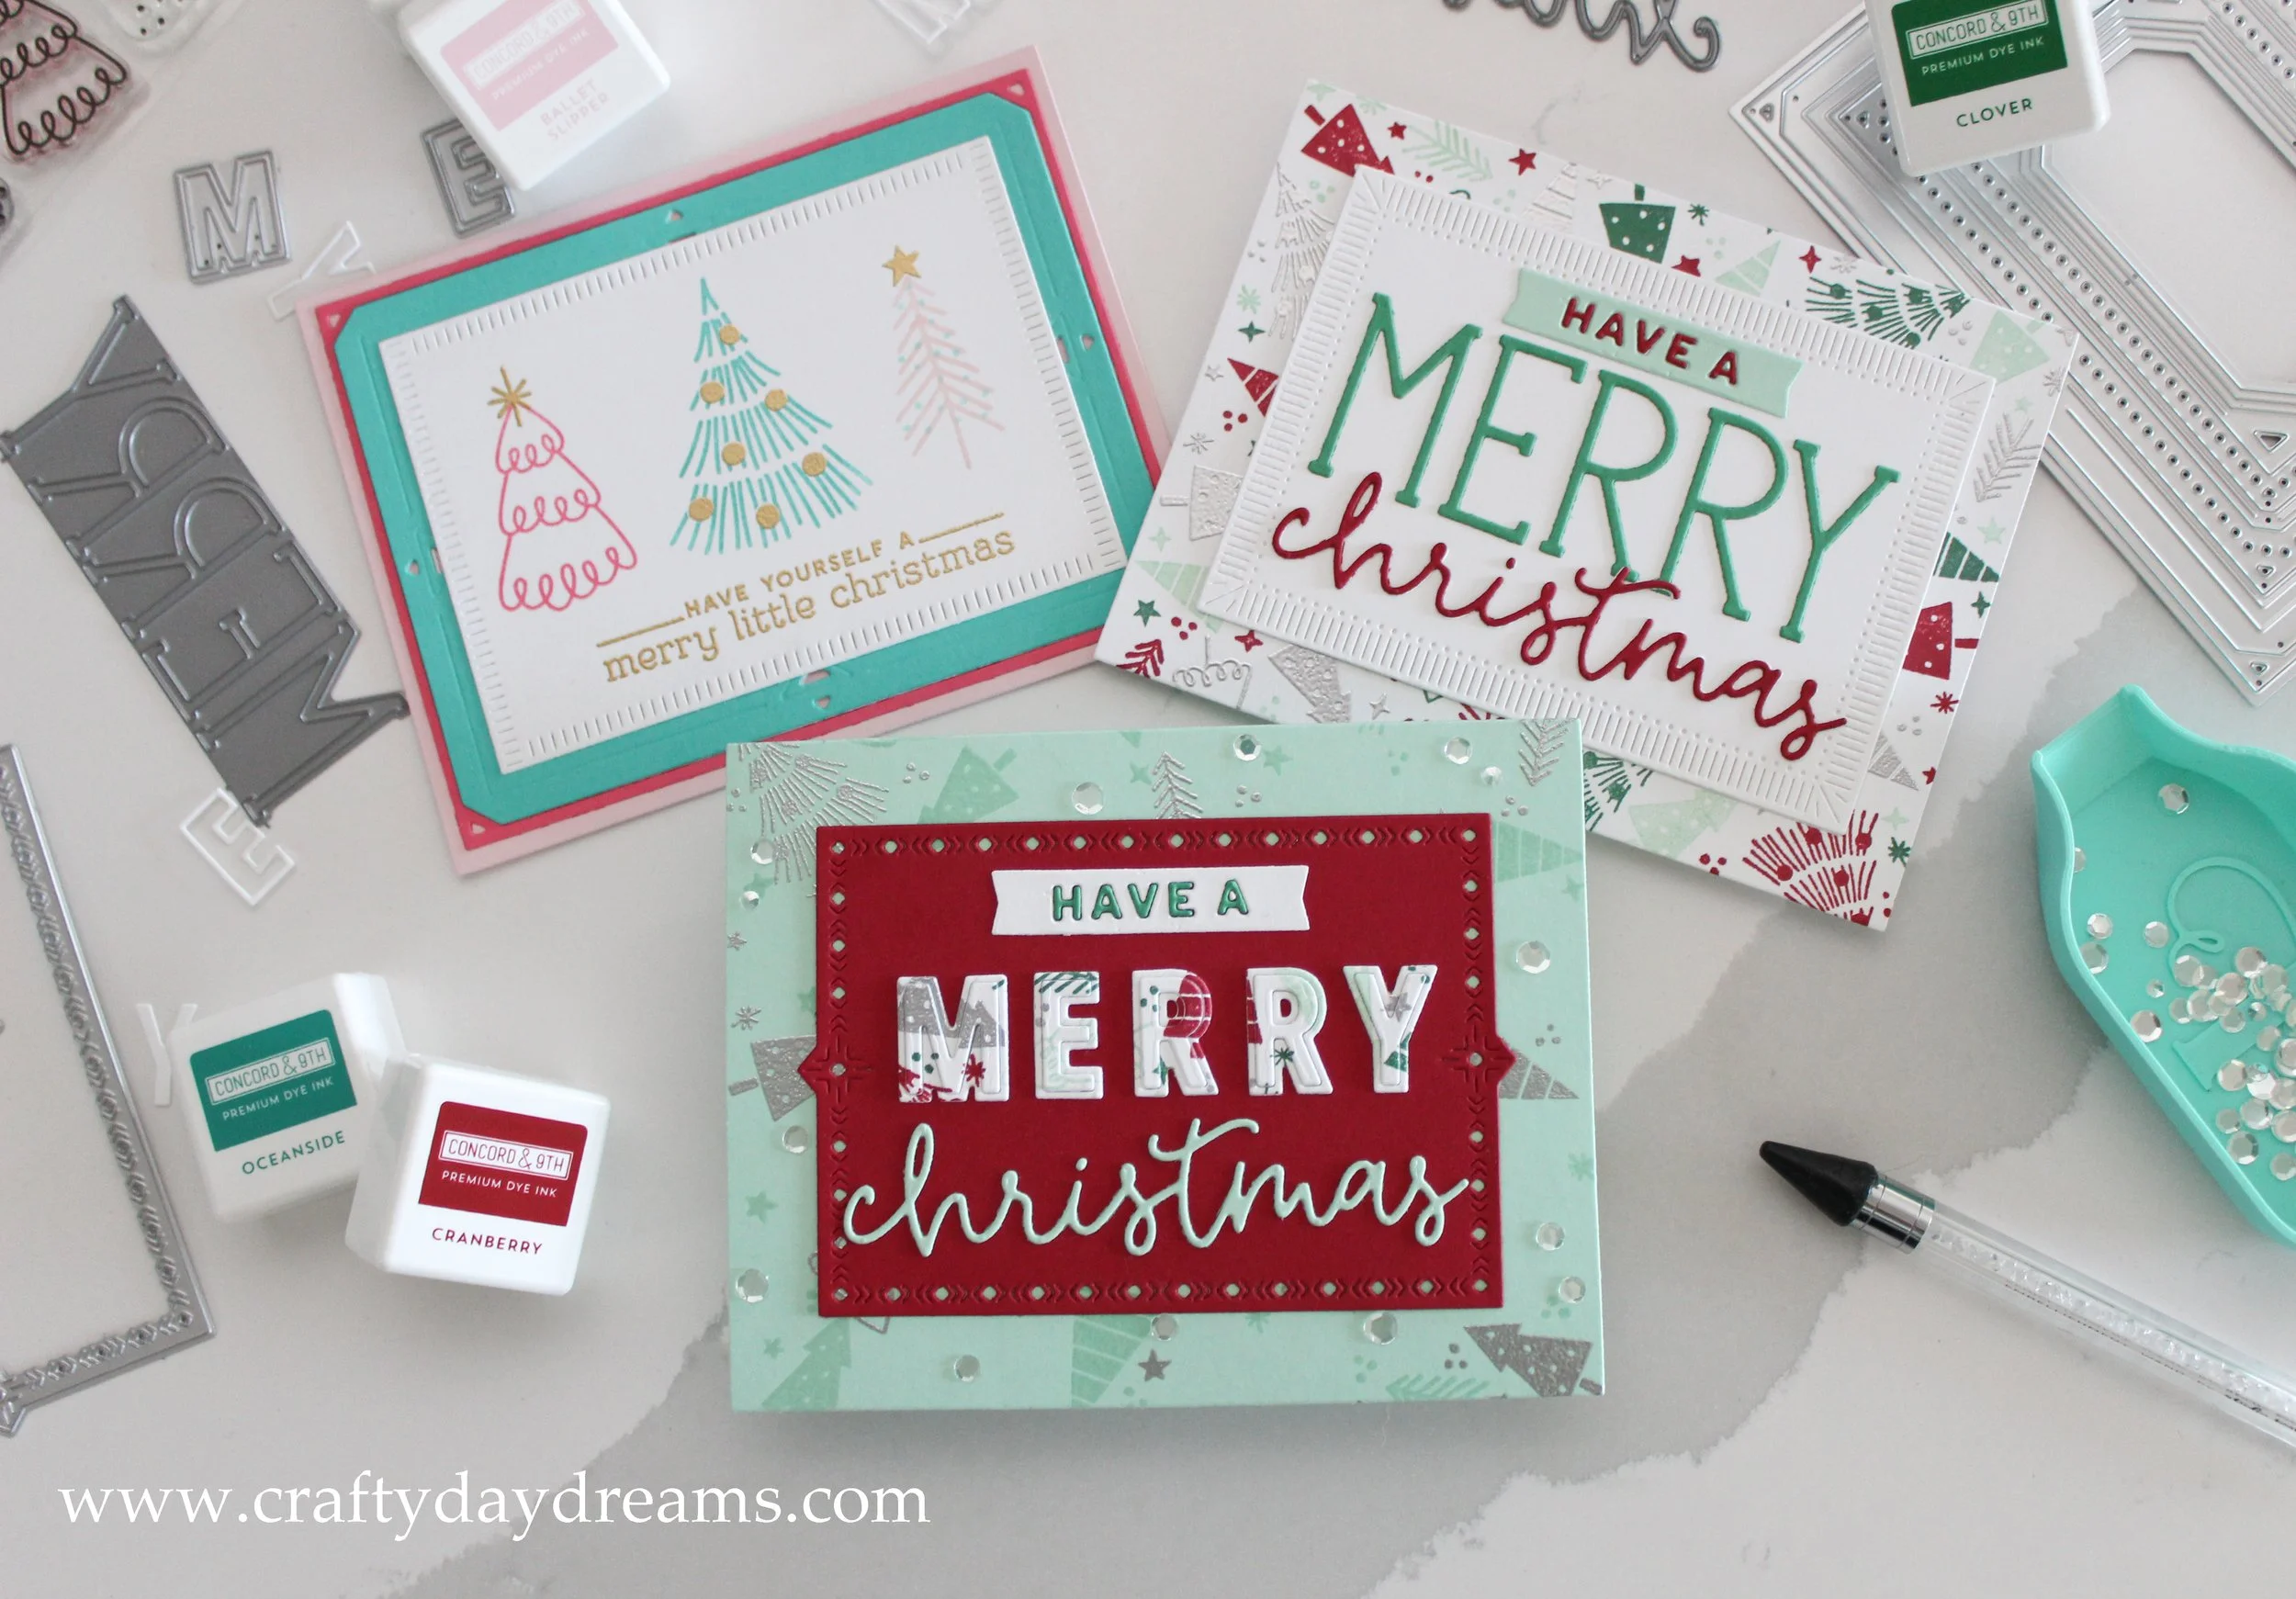
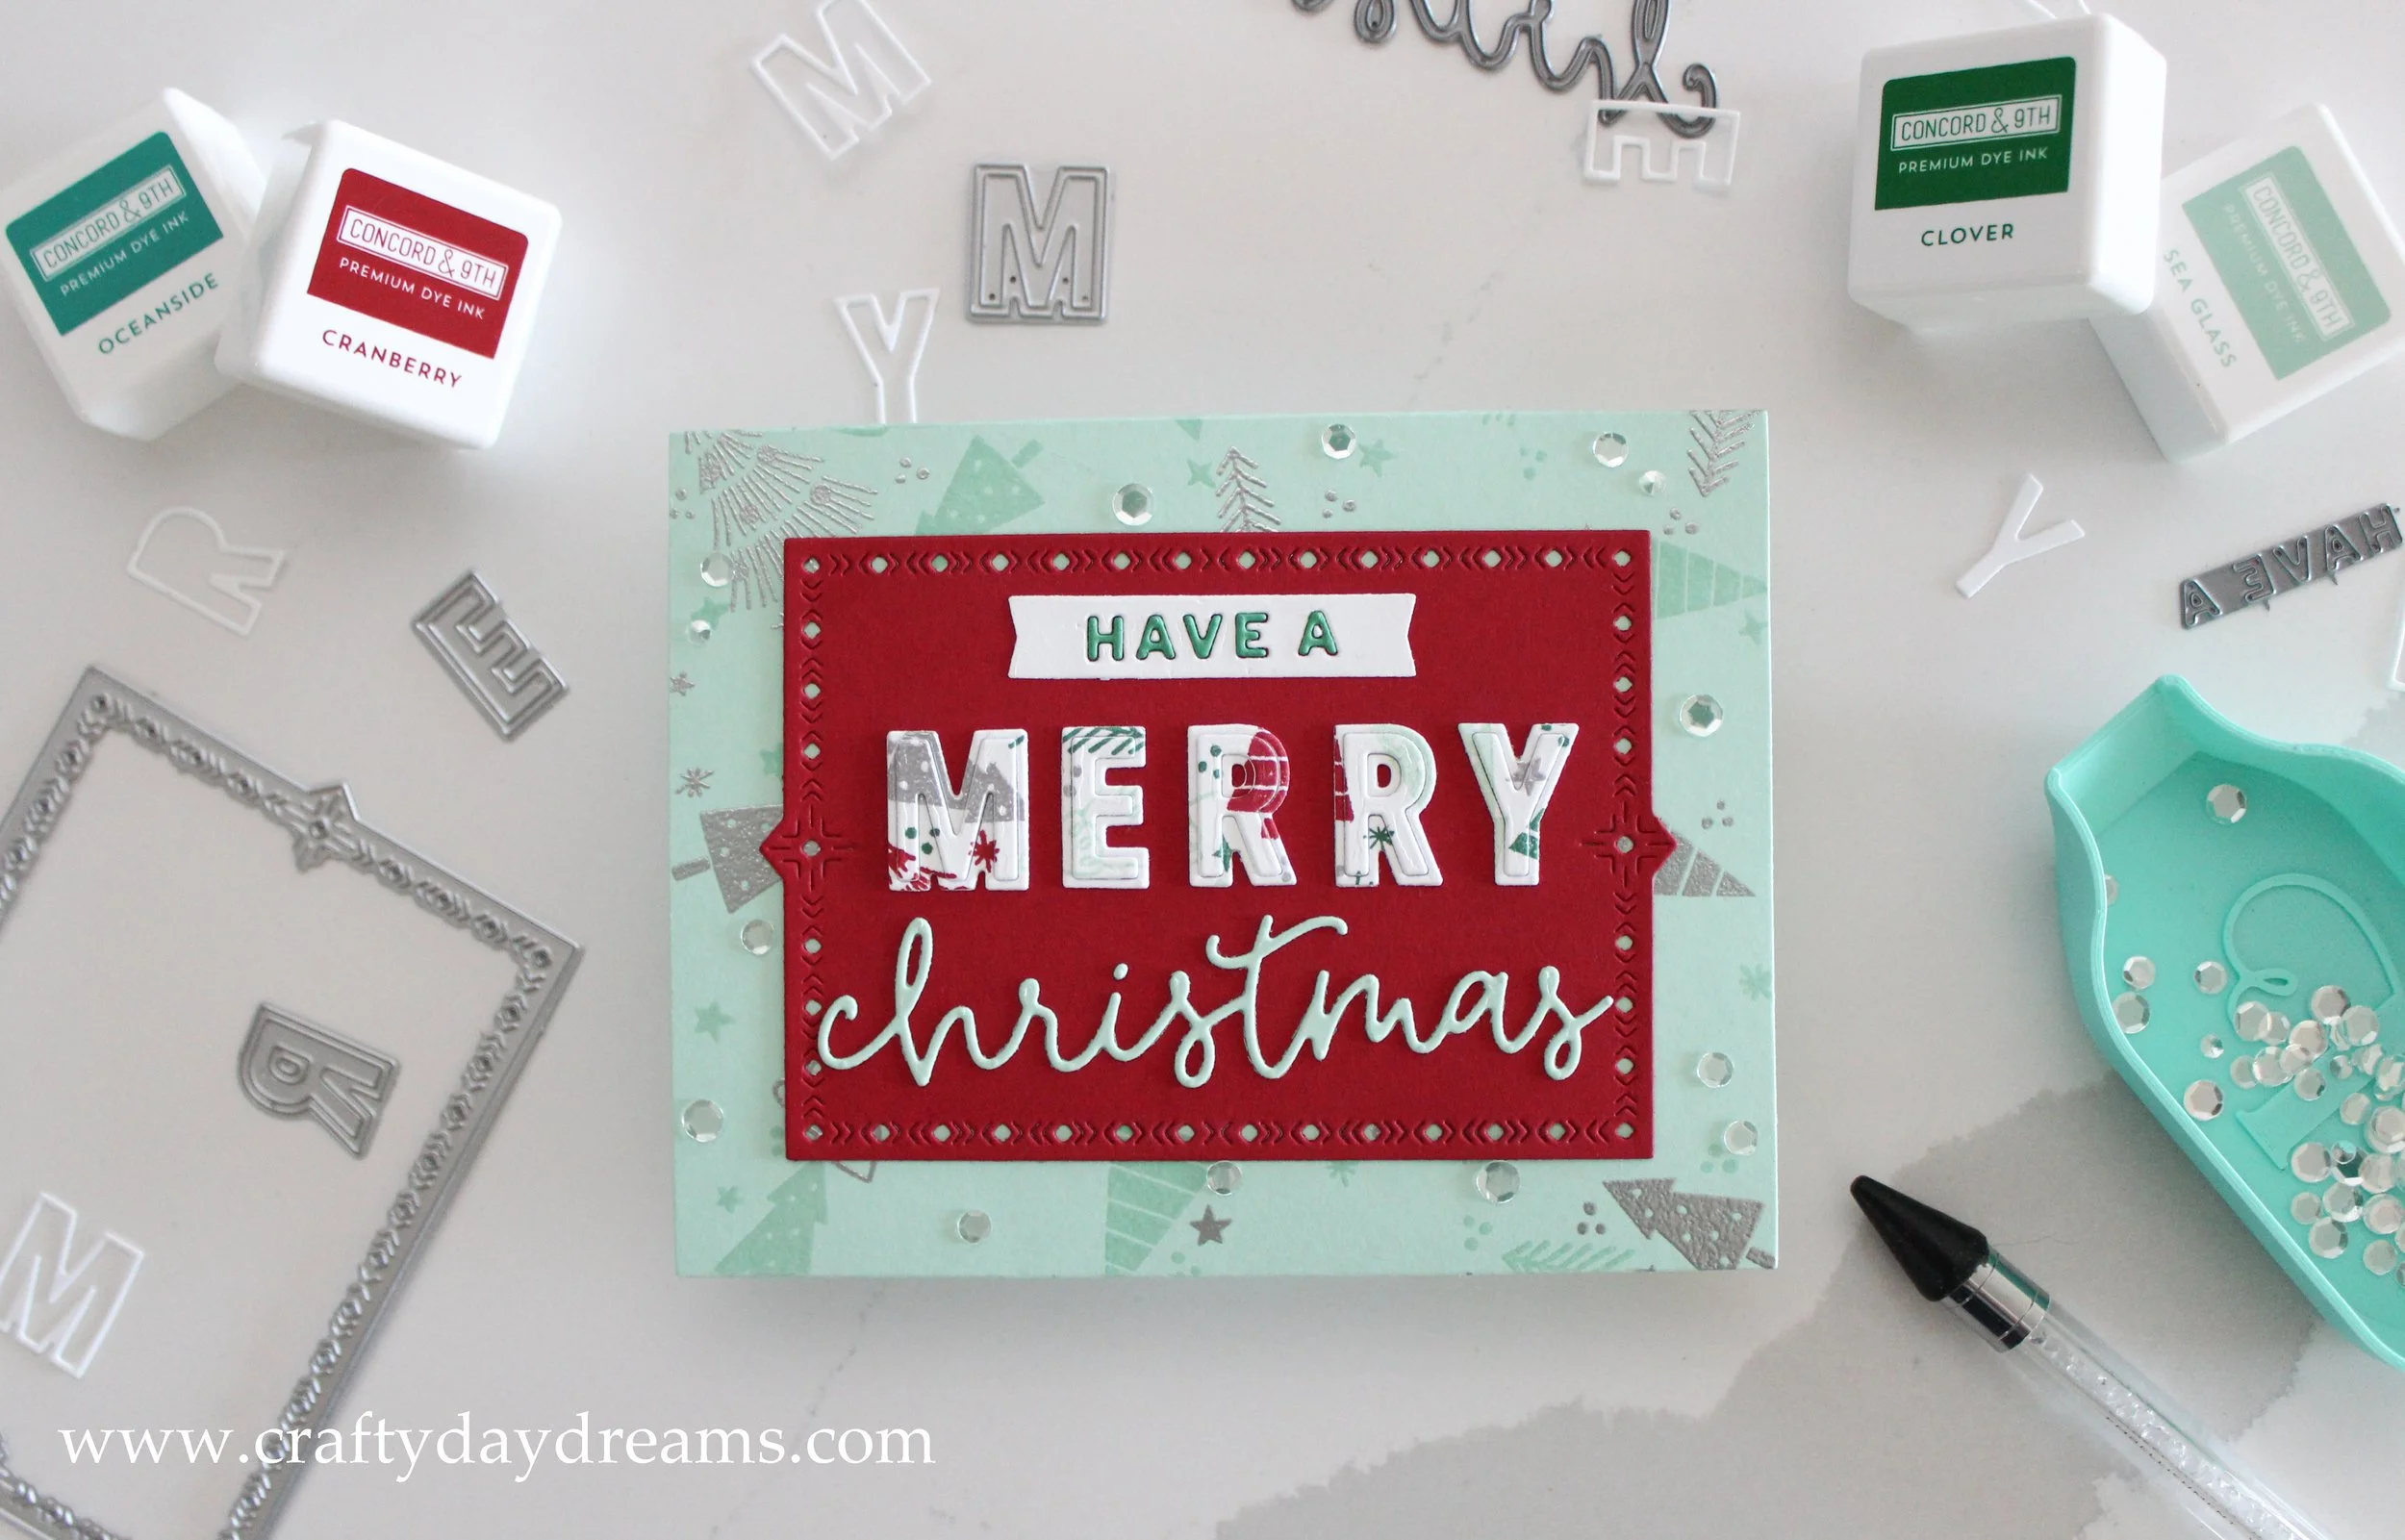
I don’t know what it is about this card, but it gives me retro Christmas vibes. Like the awesome decorations that grandparents have. Cozy, perfect. I really enjoyed making this card, and I had to pivot when making the background. This card was actually created second out of the three, but I think it’s my favorite. When I was brainstorming about the design, I had originally planned to use the same color scheme and stamp the background panel the exact same way as I did for the next card. However, my ink pads had a different plan for me lol. When I went to stamp Sea Glass, I realized my ink pad was dead, and there was no ink left. I knew it was coming since my previous panels had to be stamped at least 2 times, but I didn’t expect it so soon! Also at this time, I noticed that my Clover ink pad was losing its juice as well. Luckily, I ordered a Sea Glass re-inker over the weekend, and a Clover re-inker last night.
At this point, it was time to pivot. I knew I really liked Sea Glass and Cranberry together, and I knew the only way I could get the Sea Glass color was to use the cardstock and clear heat emboss over it. So far in my time using turnabouts, I’ve mostly stamped different colors on white cardstock, never on colored cardstock, so I decided to only do two turns and make the second one silver heat embossing. So I heat embossed with Sterling from Brutus Monroe, popped my panel off the jig and cut it down to A2 size. Once I trimmed it, I tapped the ink pads for Clover and Cranberry on the scrap Sea Glass cardstock and realized that these colors would show up on Sea Glass and look exactly how they do on white cardstock. I was tempted to stamp on the panel with them, but since I cut it, I knew I wouldn’t be able to line it up on the jig how it would need to be.
Luckily the day I was making this card an order I had placed from The Greetery had just shown up, and it included the Nordic Frames dies. I decided to die cut the middle sized one out of Cranberry cardstock, and it would be what I would build my greeting on. For the greeting, I used a mixture of dies from the Seasonal Sayings die set and the Double Cut Letters die set, both from Concord & 9th. I die cut the banner out of regular white cardstock, and the letters that I inlaid in it out of Clover. I die cut the word ‘Christmas’ out of Sea Glass cardstock so it would tie into the background panel. Lastly, I worked on the double cut “merry”. I ended up die cutting the letters out of the extra part of my turnabout panel from the next card, and I decided I wanted to do an eclipse technique with it. In order to do this, I die cut each of the letters out of white cardstock and glued them down. Then I glued down the patterned outline for each letter, and filled the letter in with a plain white inside. I cut one more layer of white cardstock for each letter and glued them down, then glued the patterned inside letter on top. All in all, it was 3 white inner letter layers and then the patterned layer.
At this point, I thought the card was done, but when looking at it, it seemed like it was missing something. Right away, I thought of using white enamel dots (I have some left over from C9 Summer Camp), but I’m a huge overthinker with sequin placement and I like to play with it and tweak until it feels right. Since the enamel dots would stick right down, I decided sequins were the way to go. I ended up using some silver sequins that I had (also left over from C9 Summer Camp) and fiddled with them and tried to fill in some of the gaps of not having two more turns of the turnabout stamp.
Traditional Christmas
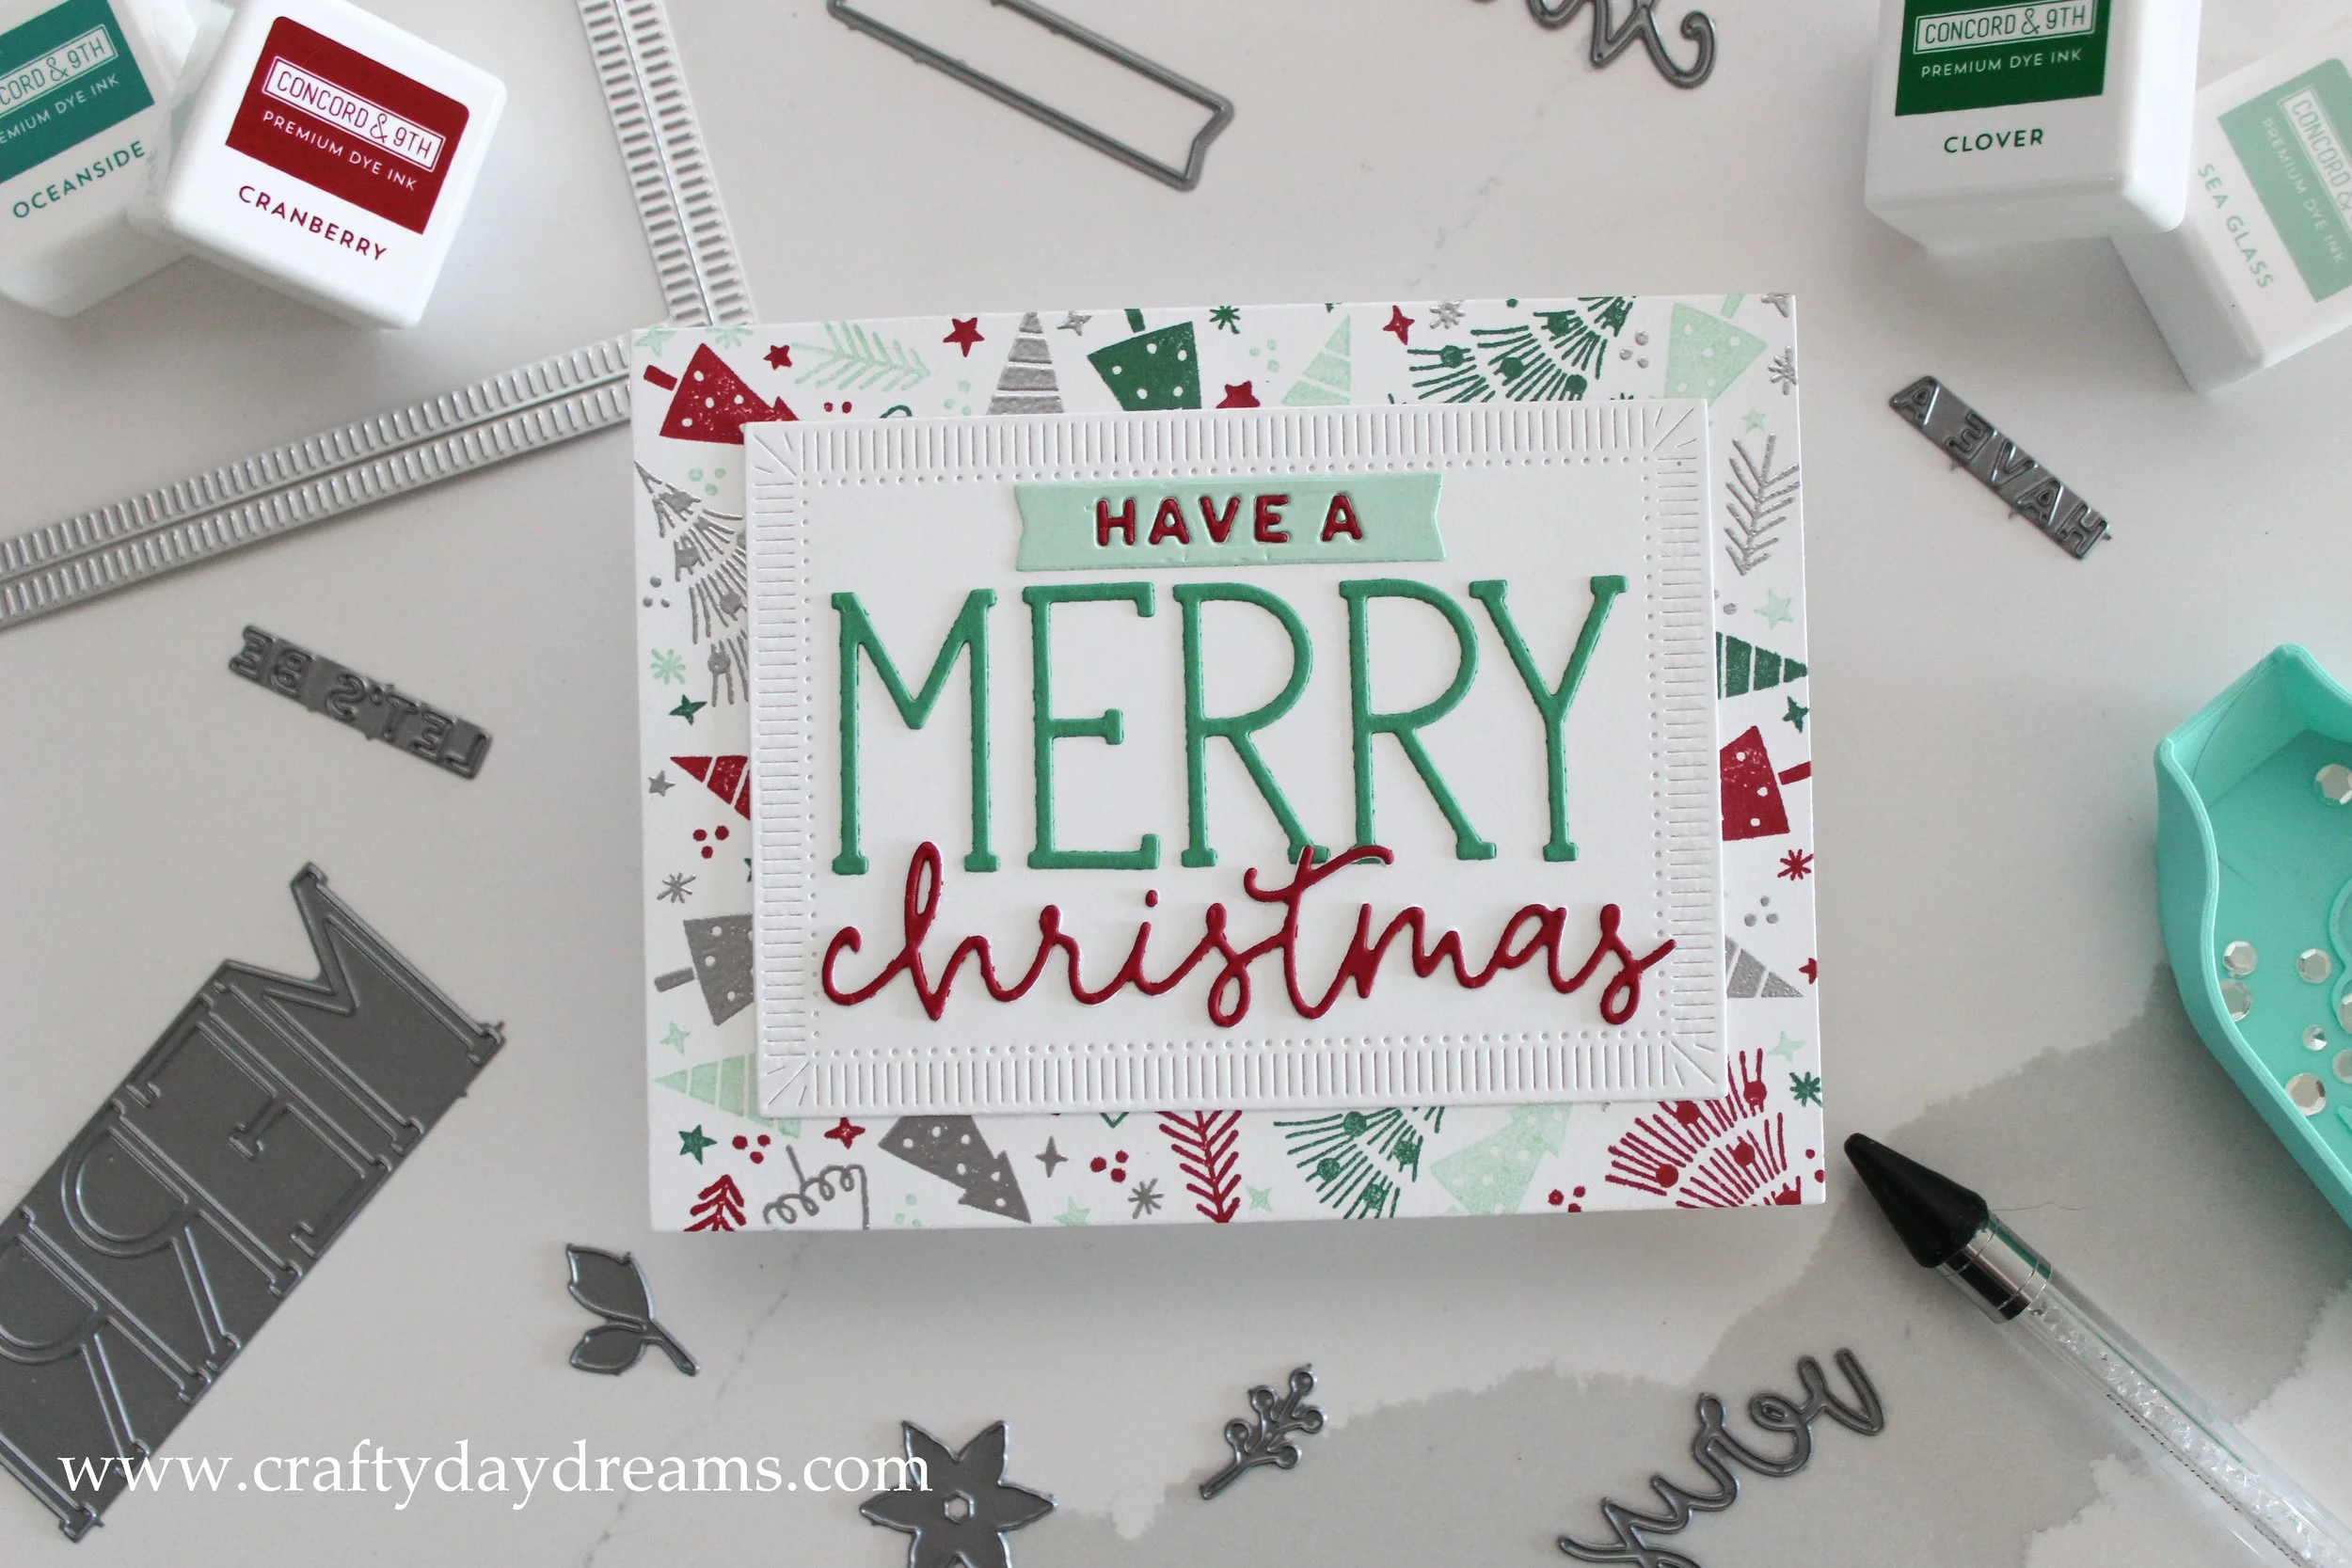
This card gives me alllll the traditional Christmas feels. You’ve got the deep red, green, silver, and lots of white. I love the fun pop of color the Sea Glass adds to this card, but I could also be biased since it is one of my favorite C9 colors. For this card I started with a 6x6 regular white cardstock panel (I always start my turnabout stamps with a 6x6, I love being able to choose a different section of the final panel if needed) and stamped my first turn with Sea Glass since it was the lightest color. After this I used Clover, then Cranberry, and wrapped it up with silver heat embossing from Brutus Monroe.
After I trimmed the panel down, I decided I wanted a smaller panel to build my greeting on. I was originally planning to slap the greeting on the background panel, but with all the colors and white space, it felt a little too busy to me. I die cut a medium sized rectangle out white cardstock using the Fluted Classics Rectangles from Spellbinders since I knew I wanted the panel to have visual interest with edge details. I used the colors of the background panel on the greeting to make it cohesive with the stamped background. I die cut the ribbon banner out of Sea Glass and the inlaid letters and ‘Christmas’ out of Cranberry, and ‘Merry’ out of Clover.
Nontraditional, colorful Christmas
For this last card, I was inspired by a picture of colorful, minimalist Christmas decor I saw on Pinterest. When I saw this picture I immediately saw Oceanside, Aqua Sky, Honeysuckle and Ballet Slippers. I decided to use this color palette with the bonus trees in the stamp set. These trees are a slightly larger version of the ones in the turnabout stamp, and they make making quick Christmas cards a breeze! When I was starting to brainstorm exactly what I wanted to do for the background, my order from Pinkfresh Studio was delivered and it included the Pretty Frames 2 die. This single die cuts out 8 frame dies from it. My order also included other edge dies, so I die cut the Pretty Frames 2 die out of plain white cardstock to see what each frame looked like so I could decide what die to use. I really liked the second largest frame and knew I wanted to use it, but after playing with the card panel, I decided I would also use the outer frame as well, so I die cut the cover plate die out of Oceanside and Honeysuckle.
With the frames being cut, I knew I needed a rectangular panel to go on top of them for the greeting. I could have inlaid a panel that the frames hung over, or stamped directly on the card base, but I chose to die cut white cardstock with a blanket stitched die from PinkFresh Studio. It worked out great since this seemed to line up well with the Oceanside frame. On this panel I decided to stamp the largest tree in Oceanside, and the left and right in Honeysuckle and Ballet Slippers, respectively. I then stamped the ornaments on the stick like tree in Aqua Sky ink to bring that color into the panel. After this, I stamped and gold heat embossed the stars, ornaments and greeting in Gilded from Brutus Monroe. Once this was done, I added some paper strips on the panel to give it a little strength since it wouldn’t be touching the middle of the card base, and the Oceanside frame had 2 white frames underneath it for some dimension. Then I glued the large Oceanside frame onto the card base and the thin Honeysuckle one around it.
I hope you liked the three cards I made using the Tiny Trees Turnabout stamp! I enjoyed putting these together, and it was fun to kind of challenge myself to see how many designs I could come up with using this set and a couple of extra dies. Keep an eye out for next week where I will be doing the same with the Iconic Christmas Turnabout stamp!
Catch you next time!


