Spellbinders—More Club Blooms Birthday Cards!
Hello, again!
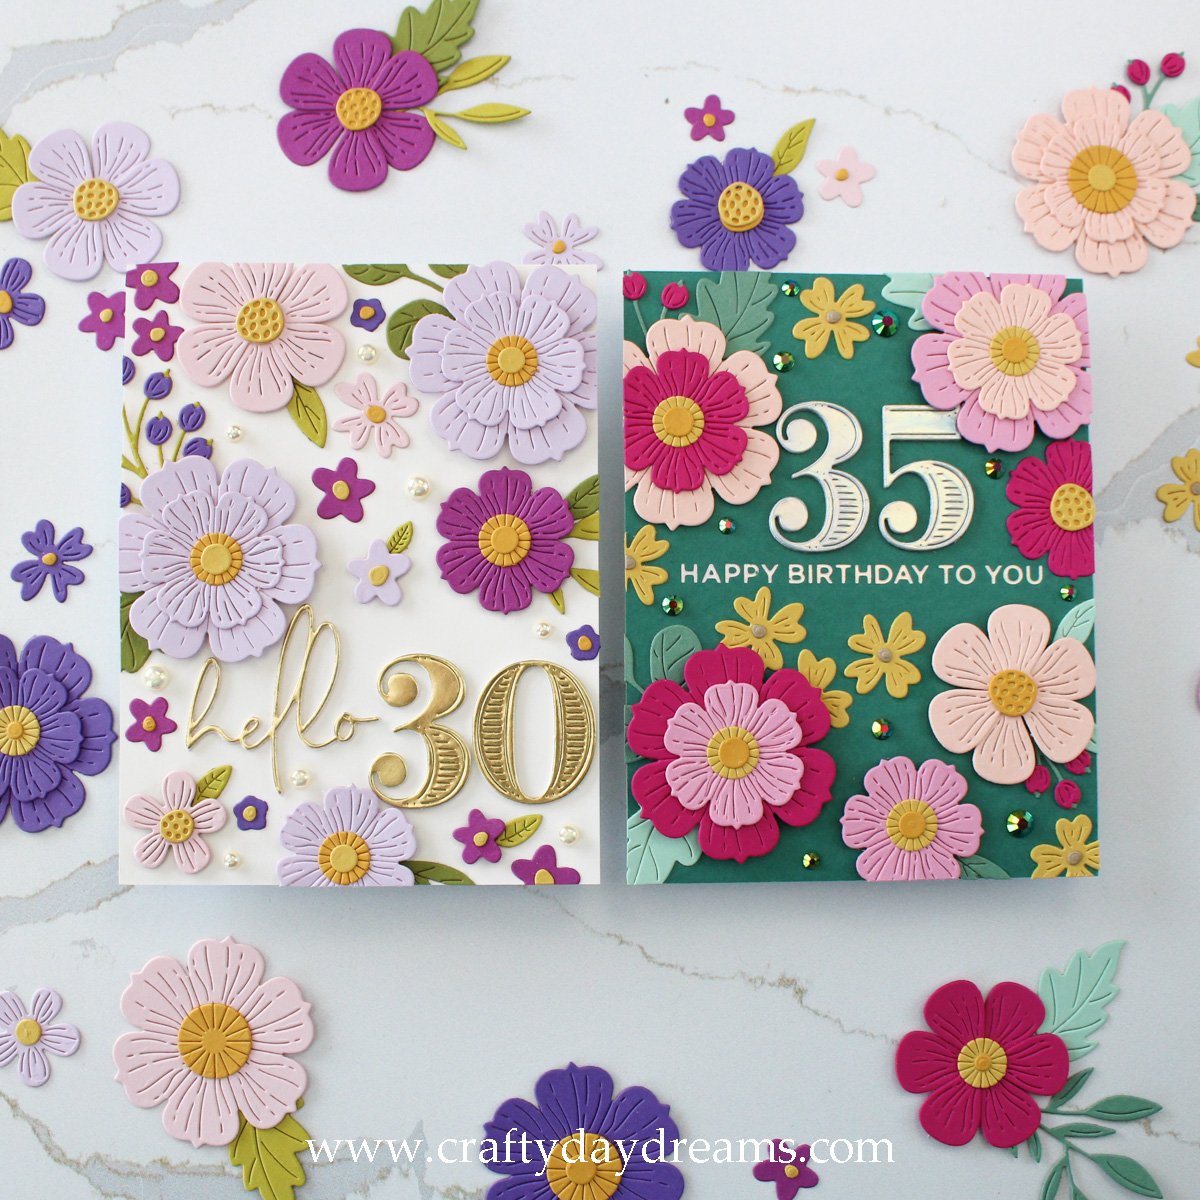
As I hinted in my last post (and YouTube video), my sweet friend Emily asked me to make two birthday cards for her sisters’ upcoming milestone birthdays—30 and 35. She wanted the 30th birthday card to be in the theme of pearl, and the theme for the 35th to be emerald—both of these are associated with those birthdays. Needless to say, I was excited to jump in and get crafty!
Pearl
I love how light and airy this card turned out! Emily told me that her sister’s favorite color was purple and that she would like it incorporated into the card. I basically went with the same color palette as the one I had for my grandma’s card—Ballet Slipper, Lilac, Orchid (TSM), and Grape Soda. The flower centers and greenery are also the same: Sunflower and Honeycomb, Lemongrass and Avocado. Instead of a dark purple card front, I went with Ivory for and I love it!
For the sentiment, I die cut the ‘hello’ from the Wonderful Scripty Sentiments die set from Spellbinders and die cut it out of matte gold cardstock. I used the Bold Numbers die set from The Greetery and die cut that out of the same matte gold as well as 2-3 layers of white cardstock to build up both the sentiment and the numbers. I built the arrangement fairly similarly to my grandma’s card, so if you want to see that, check out my YouTube video! I used the Lilac flowers as my focal point and arranged them in a type of zig-zag down the page. This allows the eye to naturally travel down the page and things feel pretty well balanced! The one difference I had on this card was that I brought in a Ballet Slipper flower using the small rounded floral die from the Be Bold Blooms die set. I filled in gaps in the flowers with the smallest in the Club Blooms die set as well as the smallest blooms from the Mini Blooms and Sprigs die set. I definitely could have packed more blooms onto this card, but I think this feels pretty good! To finish off the pearl theme, I added some half pearl embellishments from the Wedding Bouquet mix from Buttons and More Galore. These cards allowed me to build up my stash of gems and pearls! Lastly, I stamped the inside of the card with the sentiment ‘a little bit older, a lot more fabulous’ from the Happy Birthday Sentiments stamp set from Pinkfresh Studio in Lilac ink. This is my absolute favorite stamp set to use for the inside of birthday cards, there are a lot of sentiment options.
Emerald
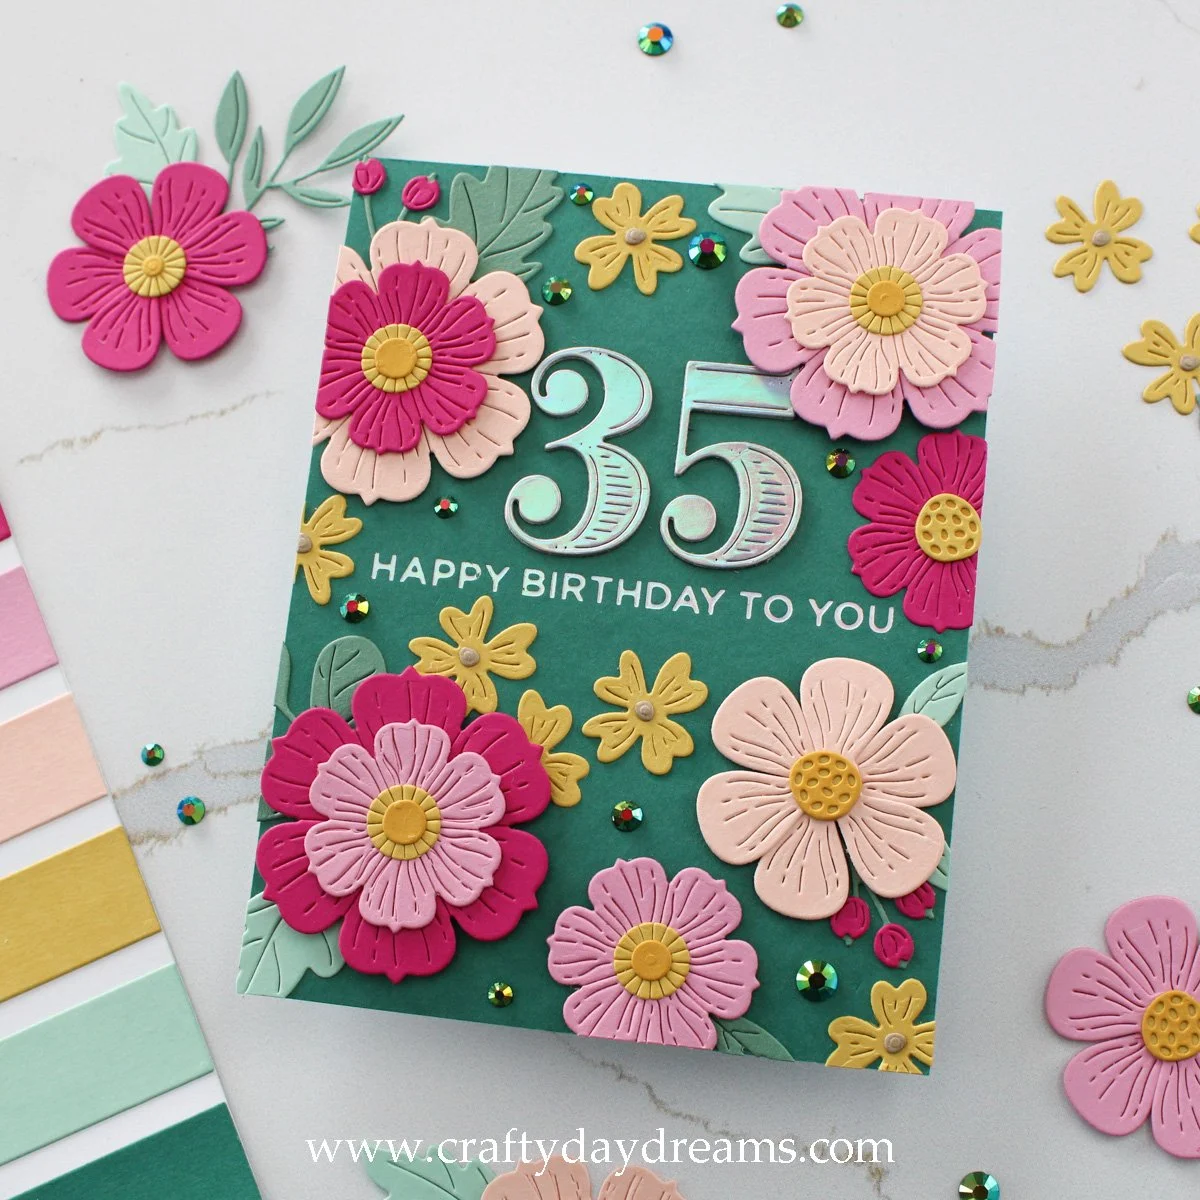
I love the drama the Juniper cardfront adds to this card! I decided to go with the dramatic background to really pump up the contrast of the flowers and again pull into the emerald theme. For this card, I did pull out a tried and true color palette that you’ve seen before—Dragonfruit, Carnation, Nectar, Honeycomb, Sea Glass, and Juniper. However, there is one addition that I added to it in order to have two different colored leaves which was Fern from The Stamp Market. So I die cut all the flowers out of the pinks, Nectar, and the smallest out of Honeycomb. I decided to play around this time and create the largest flowers out of two different colors, and I love how they look! They’re so fun. For the flower centers, I again went with Honeycomb and Sunflower, but also used Wheat for the Honeycomb flowers. I think they turned out so good! I never thought of using Wheat as a flower center! For the greenery, I went with Sea Glass and Fern, and I love how they play together as well as how they play with Juniper.
Before adhering my flowers onto my card front, I needed to add my sentiment first in order to build around it. In the past I liked how silver looked with this color palette, but I wanted something a little more fun and instead went with a holographic cardstock that I picked up a while ago from Michael’s. Luckily, Spellbinders’ Prism hot foil matches this cardstock perfectly, so I foiled the sentiment in the middle of the card front. I really wanted the sentiment to seem like it was nested in a field of flowers, so I built my florals around it. Just like the previous cards, I built up three layers of dimension—I glued down the leaves and florals that didn’t have leaves, then popped up the remaining florals on either thick or thin foam squares. And, just like the other cards, I decided to add some gems to bring more sparkle and that emerald theme, so I chose the darkest green gems from the Holiday Mix Jewelz Collection from Buttons Galore and More. I really recommend this gem set—you get a wonderful variety of gems that work for more occasions than the holiday namesake of the set. I’ve been using it a lot since I got it! I stamped the ‘don’t count the candles, just enjoy the glow’ sentiment from the same Pinkfresh stamp set in Juniper ink.
But that wraps up this post! I hope you love these cards as much as I do! Though I am ready to shove this die set in a bin for a bit before I use it again 😂. Thanks so much for stopping by today, I hope to catch you again soon!
Affiliate disclaimer: all links to Waffle Flower, Altenew, Scrapbook.com, and Spellbinders products are affiliate links. These links allow me to get a commission at no extra cost to you if you use them to shop! All other links provided are links to supplies and shops I am not affiliated with and I do not get a commission from.


