Ellen Hutson—Postage Birthday Card
Happy Thursday!
Today I’ve got a quick and easy birthday card to share with you! I’m playing around with the Postage die set from Ellen Hutson again, and this time making a shaped card with it! I’m a big fan of shaped cards, so I’m happy to have made one since it’s been a little bit since I have. I’m going to be honest and say that this card morphed a bit as I was crafting. I started out with the intention of the Tessellations die set from Altenew being the star of the show, mainly because I really wanted to use it and get it out of my ‘to-use’ bin. But as you can tell, that’s not the case!
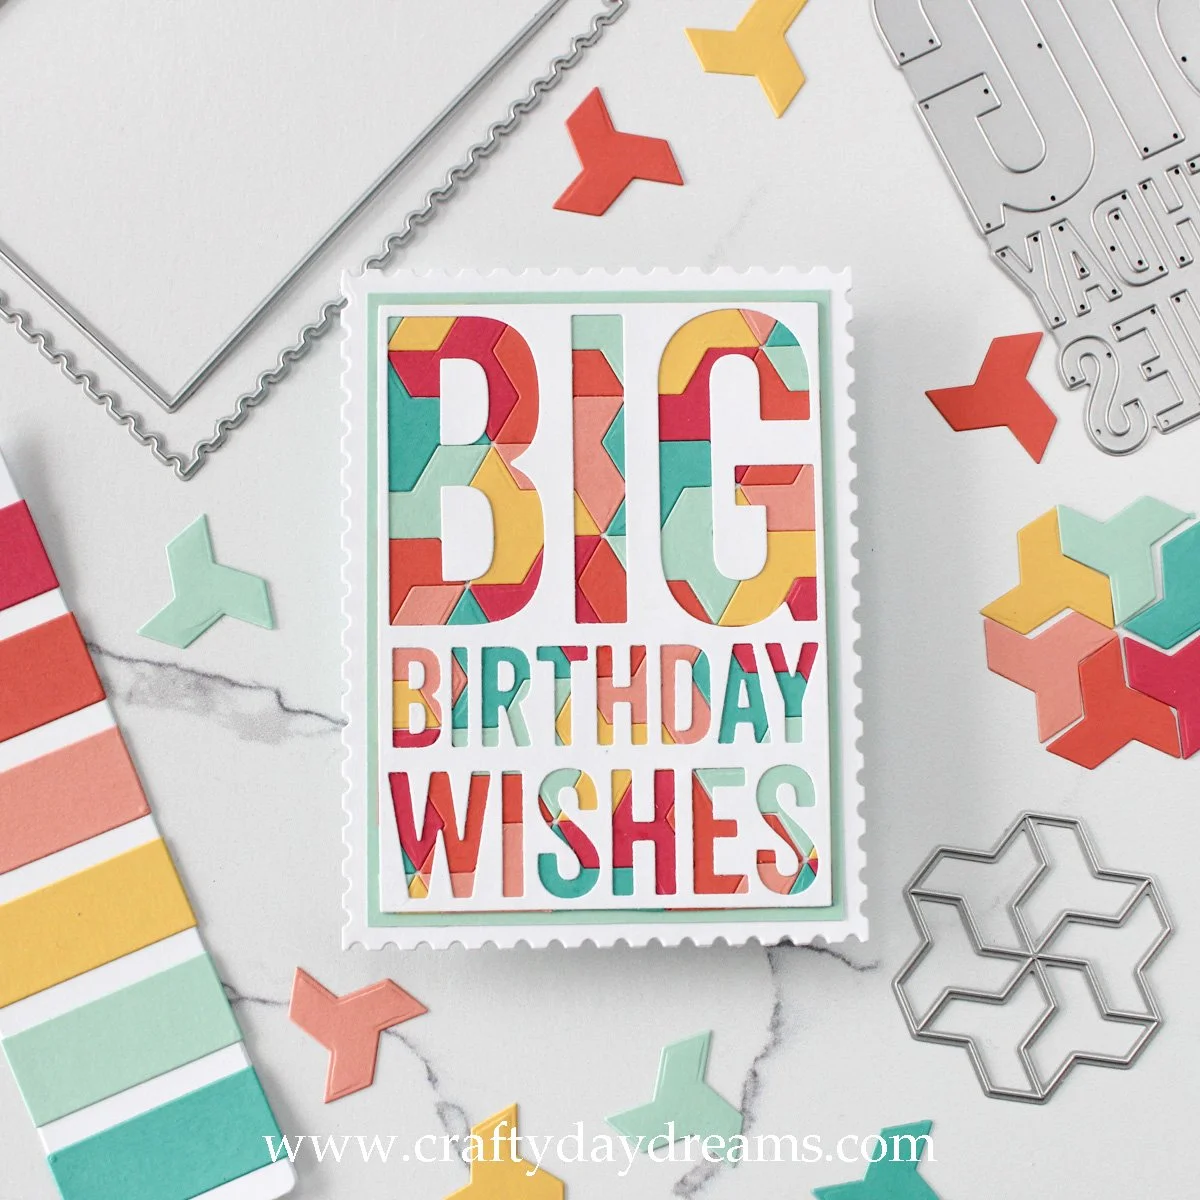
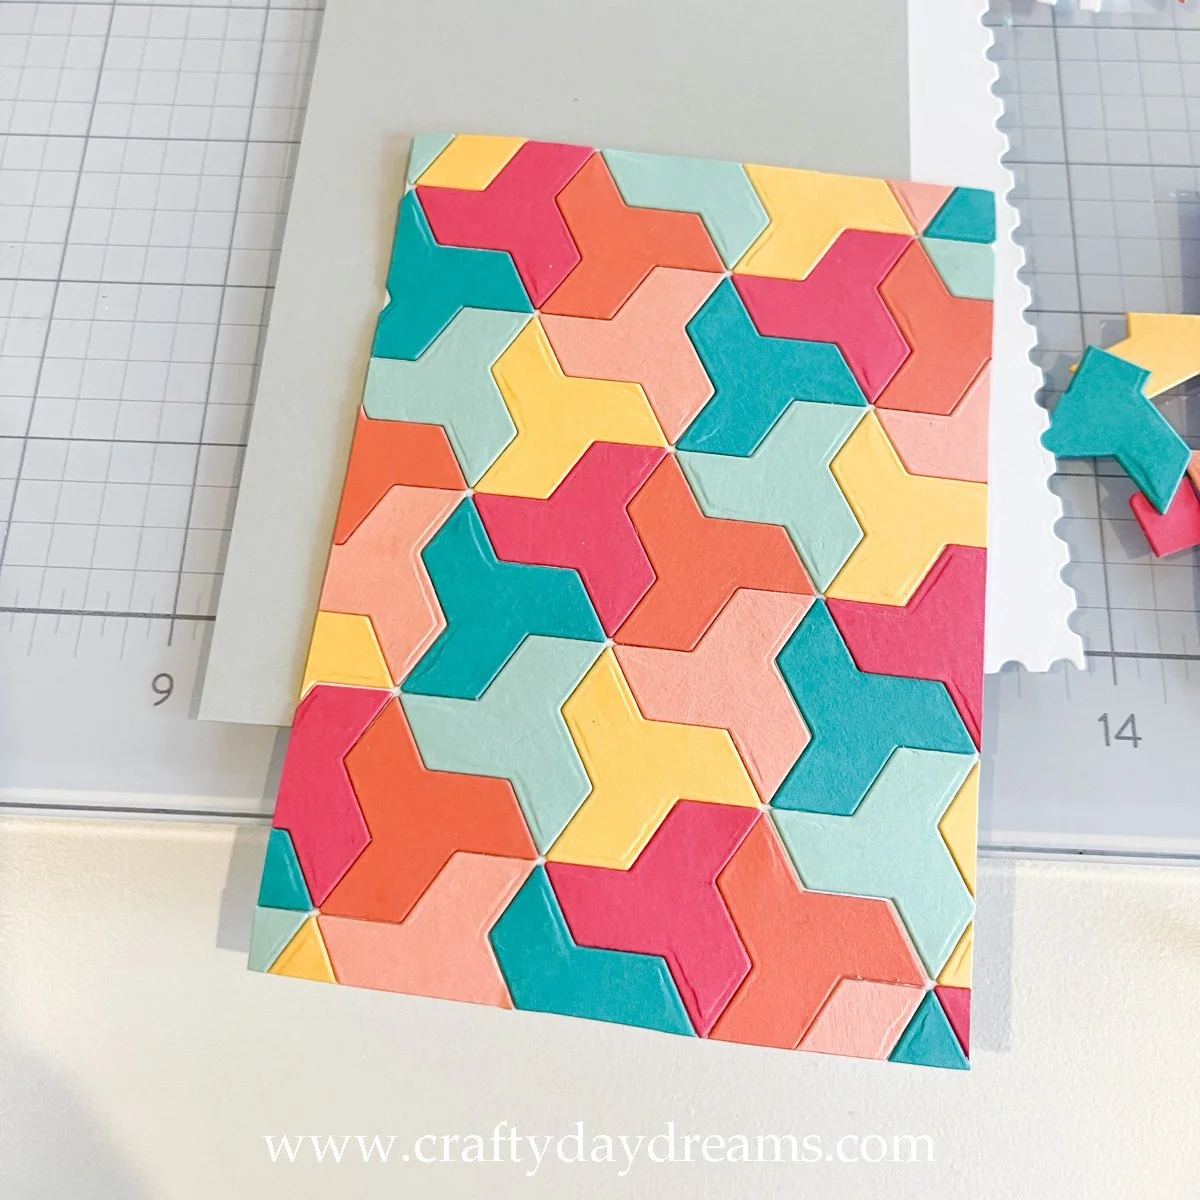
I started this card off by choosing a color palette from my handy-dandy swatchbook. I chose a six-color palette consisting of Honeysuckle, Sorbet, Grapefruit, Buttercup, Sea Glass and Oceanside. I love this palette because it’s so playful and summery! I used the ‘flower’ shaped die and die cut each color and decided to glue them down in the same order they were on my swatch. I used the nesting rectangle die that corresponds with the largest postage stamp die and die cut a piece of plain white cardstock with it. I glued a Honeysuckle tile at the top then built the rest of my shape off of it. These tiles fit together SO well and allow you to make a background super quickly.
With my background completely filled, I had thought about gluing a small matte gold circle onto the center of the ‘flower’ shapes that were in the order of my color palette (building off of each flower shape creates one where the colors are arranged differently, if that makes sense!) so it would define them a bit more, but then I had a different idea! Since I was thinking about postage stamps and how USPS has some great birthday ones that literally say happy birthday on them, I got the idea to pull out the Big Birthday Wishes die set from MFT and create something similar! I could have glued the die cut letters onto the tessellation background, but instead, I decided to glue the negative piece down which makes the letters looks like a mosaic. I really like how this looks even though it takes the tessellation look away from the card quite a bit, it’s still pretty fun and geometric!

Since the negative of the sentiment was white and spanned the whole rectangle and the postage stamp die cut was all white, I decided I wanted a mat. I used a piece of Sea Glass cardstock and cut it down to 3 5/8 x 4 7/8 -inches. These are pretty odd dimensions, but I didn’t have a nesting rectangle that was the right size that would have made this easier, so I eyeballed and chose something that was ~1/8-inch bigger. I glued the matted rectangle onto a postage stamp, then grabbed a white top folding notecard. I lined up the postage die on the notecard but let the top of the die overhang the fold so that the fold of the notecard was just under the postage ‘scallops’. This made quick work of making a shaped card, and after gluing my card front onto it, I was done! I thought about adding some sparkle to this card, but decided against it since sequins would make it feel too cramped (at least in my opinion). But this could have easily been turned into a shaker panel! Or you could have used glossy accents or a Wink of Stella shimmer pen.
I hope you enjoyed this card! I’ll have to make more because I really love shaped cards, they’re so fun! I hope you have a wonderful weekend where you are, and if you are also attending C9 Summer Camp 2023, I will ‘see’ you there! Thanks for stopping by the blog today, happy crafting! 😊
Affiliate disclaimer: all links to Waffle Flower, Altenew, Scrapbook.com, and Spellbinders products are affiliate links. These links allow me to get a commission at no extra cost to you if you use them to shop! All other links provided are links to supplies and shops I am not affiliated with and I do not get a commission from.